Navigation
Install the app
How to install the app on iOS
Follow along with the video below to see how to install our site as a web app on your home screen.

Note: This feature currently requires accessing the site using the built-in Safari browser.
More options
You are using an out of date browser. It may not display this or other websites correctly.
You should upgrade or use an alternative browser.
You should upgrade or use an alternative browser.
design your own controller with your own pic
- Thread starter in touch with the wii
- Start date
NateTheGreat
Pondering Member
Wiimote Mock-up Guide
OK, here is my unofficial guide to making a Wiimote mock-up in PhotoShop.
1. Get a good sized white wiimote picture. In PhotoShop, open that picture, press CTRL+A to select the whole picture, copy and paste it into a new file (so if you screw up, you won't have to get a new picture).
2. Once it's copied and pasted, create a duplicate of the layer the white wiimote is on and then hide that duplicate layer (by deselecting the check next to the layer) Also, make sure the duplicate layer is below the first wiimote layer. Oh, and delete the Background layer if there is one (yes, there is usually a white layer called Background and you have to double click it and then hit Enter when it asks you to rename it and then delete it).
3. Alright, now on the first white wiimote layer, use the Magic Eraser tool (click and hold on the Eraser icon on the left tool pallet and it will come up) to delete the inside of the wiimote. Make sure you don't delete the buttons and the speaker grill. When finished, you should have the outline of the wiimote and the buttons and speaker grill.
4. Now switch over to that duplicate wiimote layer that was hidden (and it should be under the wiimote layer you just used the Magic Eraser on) and make sure that this layer is aligned with the other layer. What I mean is, when both layers are visible, it should pretty much look like you never even deleted the first wiimote's insides. Now, change the color of this layer by using the Paint Bucket tool. If you do it in the center of the wiimote, it should change it almost entirly that color; I would suggest black. Now, it should look like you have a nice, black wiimote (although it may be flat-black rather than glossy).
5. Ok, you're getting close to the end now. Now, you'll want to find a picture you like, such as a videogame character; it's good to have a tall and slender character so it can span the length of the wiimote. If the character has a complicated background, I would suggest deleting it (using the Magic eraser and/or Magnetic Lasso tool which you would use to outline the character and then go to Select>Inverse>and then press the Delete key). You can keep it if you want, but it may not look as good. Now, copy and paste that character over to the wiimote file. This will automatically create a new layer for it. Now, put this picture between the two wiimote layers. The order of layers should be the Magic Erased wiimote layer-character picture layer-Colored in wiimote layer. Now, you should notice that this is looking pretty good because the buttons will be over the character as if you had put one of those controller skins on the wiimote.
6. The rest is just resizing the character so it looks nice and maybe even adding some blending layers like a Stroke (which can be added to any layer by double clicking on the layer; there are lots of blending modes so try them out with Preview selected when the Blending options window pops up). Also check out the Styles aswell. You'll probably only want to use blending modes and styles on the character picture layer and/or the colored wiimote layer, not the magic erased wiimote layer. I would suggest applying a Bevel and or Emboss Blending mode on the colored wiimote layer to make it look more rounded and 3D and also try using a gradiant aswell, although I haven't tried it for some reason.
7. Now if you haven't already saved your masterpiece, do so as the default psd file type to where ever you want.
8. Then, do File>Save As>and save it as either a jpg (bigger but better quality file) or gif (smaller but less high quality file) and then upload it to a photo upload site like Fileshack or Photobucket or upload it at this site and you're done.
Well, that was a long post but I hope it helped you and those who are perplexed (like I was) in making a themed wiimote mockup.
If anyone has questions, ask and if anyone knows a quicker/better way of doing this please say so, but this is the most basic "always works" method.
Last edited:
Marthmaster
King of pwnage.
i'm getting hung up on the layer part. plus, i'm using paintshop pro 7. could you maybe provide some pics as references?
NateTheGreat
Pondering Member
Sure, I'll do my best. Just give me a few minutes and then I'll edit this post and put the pictures in...Marthmaster said:i'm getting hung up on the layer part. plus, i'm using paintshop pro 7. could you maybe provide some pics as references?
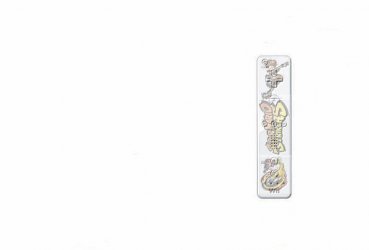
*EDIT* Alright, these are the layers in order. Note: I am using a Mac, so this will look slightly different that the Windows version of PhotoShop CS 1. The layers are labled as described in my guide and the one shown is the one highlited in the Layers pallet in the lower right.
(click to enlarge images)
Transparent Wiimote (I know it looks grey, but it's actually hollowed out)

Character Picture

Colored Wiimote

Finished Wiimote

Now, I just looked at a screen shot of paint shop pro 7 and I did not see a Layers pallet. In PhotoShop, you have different layers, so you only screw up one layer if you screw up instead of having just one layer. This all may still be possible on Paint Shop Pro 7, but I'm not sure how. I would suggest looking for Paint Shop guides for doing the things I do in PhotoShop, or better yet, go here and click the Try button next to PhotoShop CS 2 and then select Win or Mac from there. You'll have to create an adobe account, but it's free and quick. Download the trial version which lasts like a month or two, or look on limewire or bittorrent or some place like that and well, you should know what to do there.
Also, ask ssbb_lover how he did his wiimote mock-up because he's pretty skilled at using just plain old Microsoft Paint. You really don't need multiple layers, you just need a wiimote that is hollowed out, like the first one is, a character picture you like, and a colored in wiimote picture. The hollowed out and colored wiimote pics need to be aligned and in between them would be the character picture.
If you need more details, or have other questions, please ask.
Last edited:
NateTheGreat said:Sure, I'll do my best. Just give me a few minutes and then I'll edit this post and put the pictures in...
*EDIT* Alright, these are the layers in order. Note: I am using a Mac, so this will look slightly different that the Windows version of PhotoShop CS 1. The layers are labled as described in my guide and the one shown is the one highlited in the Layers pallet in the lower right.
(click to enlarge images)
Transparent Wiimote (I know it looks grey, but it's actually hollowed out)
View attachment 461
Character Picture
View attachment 465
Colored Wiimote
View attachment 463
Finished Wiimote
View attachment 464
Now, I just looked at a screen shot of paint shop pro 7 and I did not see a Layers pallet. In PhotoShop, you have different layers, so you only screw up one layer if you screw up instead of having just one layer. This all may still be possible on Paint Shop Pro 7, but I'm not sure how. I would suggest looking for Paint Shop guides for doing the things I do in PhotoShop, or better yet, go here and click the Try button next to PhotoShop CS 2 and then select Win or Mac from there. You'll have to create an adobe account, but it's free and quick. Download the trial version which lasts like a month or two, or look on limewire or bittorrent or some place like that and well, you should know what to do there.
Also, ask ssbb_lover how he did his because he's pretty skilled at using just plain old Microsoft Paint. You really don't need multiple layers, you just need a wiimote that is hollowed out, like the first one is, a character picture you like, and a colored in wiimote picture. The hollowed out and colored wiimote pics need to be aligned and in between them would be the character picture.
If you need more details, or have other questions, please ask.
Man that was very good job, good job
how can I get a free phtoshop?
Icetrash
King K.Rool
Arcadium said:Man that was very good job, good job
how can I get a free phtoshop?
if you read the whole post correctly you would clearly see he states a few different ways of getting free photoshop
OP
in touch with the wii
prez , you suck :p
- Thread Starter
- Thread starter
- #67
i like all of your work guys keep it up
NateTheGreat
Pondering Member
Thanks, Arcadium.Arcadium said:Man that was very good job, good job
how can I get a free phtoshop?
Yeah, it sort of took a while to make that post, but I think it's worth it. To get a free trial of PhotoShop, just follow the link I gave in that paragraph below the pictures, like Icetrash suggested.ssbb_lover
Novocain Stain'd
Wut was that last post Kakashi?
Good job Nate w/ the pics all in steps, very nice.
*EDIT*
Good job Nate w/ the pics all in steps, very nice.
Tank uin touch with the wii said:i like all of your work guys keep it up
*EDIT*
:lol: Thx for the compliment but it's not that hard, if any of u want to ask PM me but since all of u r using more advanced programs u won't need my helpNateTheGreat said:Also, ask ssbb_lover how he did his wiimote mock-up because he's pretty skilled at using just plain old Microsoft Paint.
Last edited:
MetroidZ
Only took 4 years to get1
there are hundreds of torrentsArcadium said:Man that was very good job, good job
how can I get a free phtoshop?
Supermariomp3
WiiChat Member
- Jul 3, 2006
- 692
- 1
ssbb_lover
Novocain Stain'd
That on'es pretty cool, except that it's based on just SS and not all the sports. Try one that has a hint of tennis, soccer and...kart.
NateTheGreat
Pondering Member
That's pretty nice, Supermariomp3. It really looks like something you'd see on the shelf or sold as a package with Super Mario: Strikers.
ssbb_lover
Novocain Stain'd
Wooh. U think they will sell wiimotes w/ games???
Similar threads
- Replies
- 27
- Views
- 18K
- Replies
- 9
- Views
- 10K