Now the longest post on Wii Chat.
Wish a character was in the Super Smash Bros. series?
Then make a moveset of that character or see if it is in our giant collection.
This thread is a compolation of fan movesets of any character they want to see as a playable character in the Super Smash Bros. series and revisions of movesets of characters that already are in Super Smash Bros. Feel free to request movesets that you want to see, criticizes movesets because we all can improve, or discus movesets just for fun.
We know these probably wont happen but we just enjoy making them.
Current Moveset Makers
The Storm
Mr. MR
Neosquid
Bodine
Splash_King (SSBfreakCK)
Pichu2k7
WiiAssasin
Tragonight
--------------------------------------------------------
PICHU BROS. MOVESET
(Designed with Project M in mind)
--------------------------------------------------------
Note: The movesets you see could be an edited version. To see the original post, click "Originally posted by (insert name)" in the spoiler of the character you want. The movesets in the Catalog are considered official unless otherwise stated. Also note, the movesets will be edited once in a while. Edits will be announced by me in the thread (look for Thread News or Catalog New at the bottom of my posts).
When posting a moveset put it in spoilers to save scroll space.
To make a spoiler type:
[noparse]
[/noparse]
Here is the perfered template you should use when posting a Moveset. You don't have to use it, but if you do use it, it will be on this post (or the next post) much faster than if you didn't use it.
Template Below in Spoiler
--------------------------------------------------------
--------------------------------------------------------
When creating movesets measure the length of a projectile or move with Final Destination in Super Smash Bros. Brawl.
--------------------------------------------------------
–=•Catalog•=–
Super Mario
King Boo Moveset
King Bob-omb Moveset
Legend of Zelda
Masked Link Moveset
Toon Zelda and Phantom Zelda Moveset
Ghirahim Moveset
Pokémon
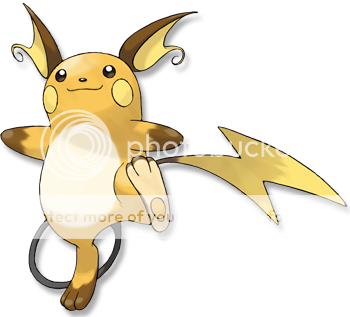
Raichu Moveset (Mr. MR)
Raichu Moveset (The Storm)
Haunter Moveset
Gengar Moveset
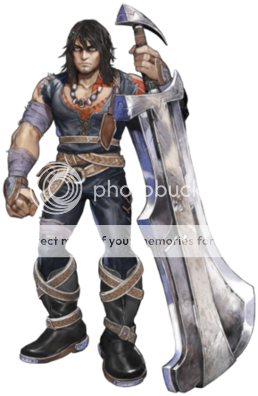
Hitmonchan Moveset
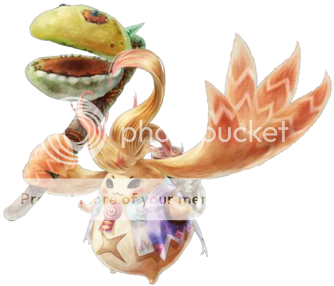
Magikarp Moveset
Dragonite Moveset
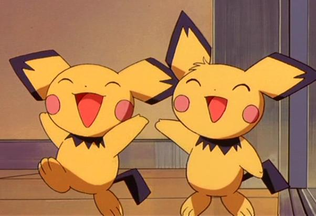
Pichu Bros. Moveset (Designed with Project M in mind)
Sableye Moveset
N Moveset (Includes Zorua, Zoroark, and Klinklang)
*This post will be constantly updated*
Wish a character was in the Super Smash Bros. series?
Then make a moveset of that character or see if it is in our giant collection.
This thread is a compolation of fan movesets of any character they want to see as a playable character in the Super Smash Bros. series and revisions of movesets of characters that already are in Super Smash Bros. Feel free to request movesets that you want to see, criticizes movesets because we all can improve, or discus movesets just for fun.
We know these probably wont happen but we just enjoy making them.
Current Moveset Makers
The Storm
Coming Soon
Mr. MR
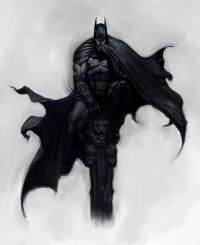
1. Batman
2. Batman (Revision)
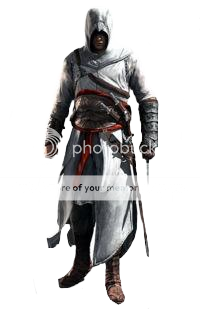
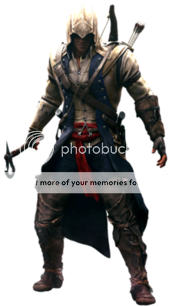
3. Altaïr Ibn-La'Ahad
4. Ezio Auditore da Firenze
5. Toon Zelda/Phantom Zelda
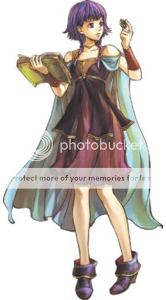
6. Lute
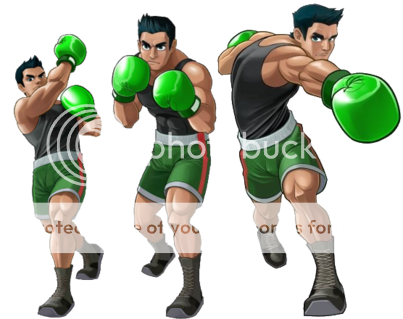
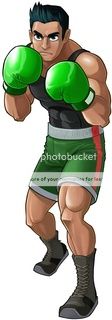
7. Little Mac
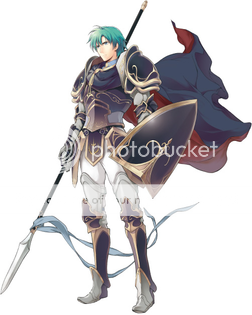
8. Ephraim
9. Raichu
10. Minecraft Steve
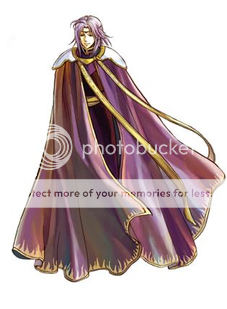
11. Lyon
12. Masked Link
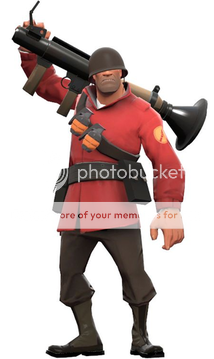
13. Soldier
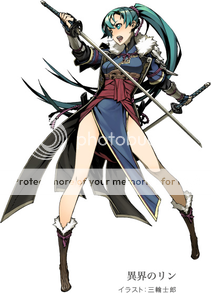
14. Lyndis
15. Gengar (THE DAWN OF THE FINAL DAY MUAHAHAHAHAHA)
16. Ratonhnhaké:ton (Connor Kenway)
17. Gengar
18. Little Mac (Revision)
19. Pichu Bros. Moveset (Designed with Project M in mind)
2. Batman (Revision)
3. Altaïr Ibn-La'Ahad
4. Ezio Auditore da Firenze
5. Toon Zelda/Phantom Zelda
6. Lute
7. Little Mac
8. Ephraim
9. Raichu
10. Minecraft Steve
11. Lyon
12. Masked Link
13. Soldier
14. Lyndis
15. Gengar (THE DAWN OF THE FINAL DAY MUAHAHAHAHAHA)
16. Ratonhnhaké:ton (Connor Kenway)
17. Gengar
18. Little Mac (Revision)
19. Pichu Bros. Moveset (Designed with Project M in mind)
Neosquid
Coming Soon
Bodine
Coming Soon
Splash_King (SSBfreakCK)
Coming Soon
Pichu2k7
WiiAssasin
1. Shulk
Tragonight
PICHU BROS. MOVESET
(Designed with Project M in mind)

Originally posted by Mr. MR
Pichu has returned but not alone. Pichu Bros. may look like an Ice Climbers pair but they play completely different; with the focus off Chain Grabbing and on Switch Combos with their Volt Switch Mechanic.
Volt Switch Mechanic: When both Pichus are Synchronized, and the lead Pichu performs any attack or throw, you will gain full control over the other Pichu. Holding the Attack Button after you perform an Aerial Attack, or a Tilt and charging Smash Attacks will make the other Pichu perform the same attack right after the other one starts (including charging the Smash attack until released). Holding the Special Button after a Special Attack will result in the same thing however by pressing both the Attack Button and the Special Button will cause both Pichu Bros. to perform Special Attacks at the same time (depending on the direction being held determines the Special being used).
Lead Pichu: The Player Controlled Pichu
CPichU: Computer Controlled Pichu, the other Pichu, the Pichu that is not the Lead Pichu
The CPichU is always trying to Synchronize with the Lead Pichu and will use Thunder Jolt towards the closest enemy when in the air as he approaches the Lead Pichu. Otherwise he will not attack unless commanded to.
Pressing any Taunt Button while Synchronized on a ledge will switch the Lead role. If the Lead Pichu dies, the other one becomes the Lead Pichu.
Because Volt Switching is permanent until used again, both the Pichu Bros.' percentage will be shown at the bottom at the same time.
Distinguishing Pichu's are not necessary, but distinguishing the Lead Pichu is. Only the Lead Pichu will have a Player Sign/Name above him.
Because Chain Grabbing is not the focus of Pichu Bros., Chain Grabs they may have are limited and will fail if they go beyond a certain number of consecutive grabs.
Neutral Special: Thunder Jolt
Just like in Melee, a ball of electricity that becomes a jumping line of electricity when it hits the ground.
Because both Pichu Bros. can use it at the exact time and right after each other, it is a very versatile move that can be a very effective Edgeguarding and Spacing Tool. However to discourage camping, both Pichu Bros. will suffer a 2% gain each time they use it; 1% if they are using it Desynchronized.
Side Special: Helping Hand
This move has two functions depending on whether the Pichu Bros. are Synchronized, Desynchronized, or are performing Side Special at the same time.
When Synchronized, the Lead Pichu will throw the CPichU a long distance. The one thrown automatically becomes the Lead Pichu. Attacks done out of the toss increases the damage and the knockback of the attack. This can be used as a recovery method and a finisher.
When Desynchronized, Helping Hand immediately switches control to the other Pichu. This is helpful tool to protect each Pichu when they are under assault as Desynchronization will happen often. Most combos will start with Synchronization and end with Desynchronization, however you can keep the Switch Combos going for a little longer with this Special.
When both Pichu Bros. use Helping Hand at the same time while they are in Synchronization by way of pressing the Attack Button and the Special Button at the same time while holding the Directional Stick to the Side, the CPichU will throw the Lead Pichu. Same as when normally done in Synchronization, attacks done out of the toss increase the damage and the knockback of the attack.
When Desynchronized, the doubling effect will Synchronize both Pichu Bros. immediately if they are in close range, otherwise it does nothing.
Up Special: Agility
Because they rely on each other, their complete Up Special can only be done together. The recovery has 4 parts both in Synchronization and in close range in Desynchronization, unlike Pichu's 2 part recovery in Melee. However the new Agility has not been slowed down.
Alone, each Pichu can only perform one half of Melee Pichu's Agility, however together they have a complete Agility. Ground Canceling Agility works directly on the ground and Agility deals 0% in both parts.
When done in Synchronization, or in very close Desynchronization, the Lead Pichu will perform the first half of Melee Pichu's Agility and takes the same amount of time. In the case of a very close Desynchronization, the CPichU will perform the first part as if he was Synchronized (meaning that the CPichU will appear right next to the Lead Pichu). If the CPichU is attacking when the Lead Pichu uses Agility, the CPichU will not auto Synchronize with the Lead Pichu. The next three parts takes as much time as the second half of Melee Pichu's Agility would take. Next the CPichU will perform a complete Agility with its first half following the same path as the first part and the second half in a new direction. At this point the roles Switch. The former Lead Pichu will follow right behind the new Lead Pichu.
When done in close but not too close Desynchronization, the CPichU will perform half of Melee Pichu's Agility towards the Lead Pichu and the second half in the direction held. Then the Lead Pichu will Agility through his path and then move in the new direction held leaving the CPichU behind.
When Ground Canceled, the CPichU will not follow the Lead Pichu. When used at the same time, they will use Agility as if they were Desynchronized, however this allows them to Ground Cancel Agility together giving them impressive mobility.
Down Special: Thunder
Pichu Bros. Down Special is more like Pikachu's Thunder in Brawl. Opponents will bounce off it like a wall instead of being lifted up through it like it was in Melee. Opponents trapped in a well spaced Double Thunder will bounce in between each one and can be used a finisher (a move I like to call Jacob's Ladder both as a Stairway to Heaven and as a High Voltage Traveling Arc). The knockback from when the Thunder strikes a Pichu is not as powerful as Pikachu's and unlike Pikachu's Thunder, the Pichu Bros. Thunder still deals 3% percent to each when hit by their respective Thunders.
--------------------------------------------------------
Note: The movesets you see could be an edited version. To see the original post, click "Originally posted by (insert name)" in the spoiler of the character you want. The movesets in the Catalog are considered official unless otherwise stated. Also note, the movesets will be edited once in a while. Edits will be announced by me in the thread (look for Thread News or Catalog New at the bottom of my posts).
When posting a moveset put it in spoilers to save scroll space.
To make a spoiler type:
[noparse]
Put your text in here
Here is the perfered template you should use when posting a Moveset. You don't have to use it, but if you do use it, it will be on this post (or the next post) much faster than if you didn't use it.
Template Below in Spoiler
--------------------------------------------------------
-Name of Character- Moveset
[noparse]
[/noparse]
[noparse]
-Character Picture-
-Character Bio-
-Game Traits such as height, weight, abilities, ect.-
Neutral B: -Name of Attack in Normal Font-
-Describe your attack in detail-
Side B:
Up B:
Down B:
Final Smash: -Normal Font-
-Write Your Stuff Here-
Grabbing: -Write Your Stuff Here-
-Enter-
Pummel:
Forward Throw:
Back Throw:
Up Throw:
Down Throw:
Neutral Attack/Jab:
Neutral Air:
Side A:
Side Tilt:
Forward Air:
Back Air:
Up A:
Up Tilt:
Up Air:
Down A:
Down Tilt/Crouch Attack:
Down Air:
Dash Attack:
Ground Attack #1:
Ground Attack #2:
Ledge Attack #1:
Ledge Attack #2:
Dodge:
Side Dodge:
Stage Entry:
Victory Pose #1:
Victory Pose #2:
Up Taunt:
Side Taunt:
Down Taunt:
--------------------------------------------------------
When creating movesets measure the length of a projectile or move with Final Destination in Super Smash Bros. Brawl.
--------------------------------------------------------
–=•Catalog•=–
Super Mario
King Boo Moveset
Originally posted by The Storm

Special Ability: Float: King Boo cannot activate or trip any land based bomb or device. He can still be harmed by things above the ground, such as Bom-ombs.
Neutral B: Boolicious Summon
King Boo summons one of his minion Boos, and throws them at the opponent in rapid volley. The ghost do no damage, but instead pass through the opponent, including all objects/walls. Each time a Boo passes through the opponent, they are stunned for 1.3 seconds. This attack is very fast, however, multiple Boos passing through the opponent do not stack the stunning time. (Eg: If the opponent is hit with more than one Boo at the same or near the same time, they are still only stunned for 1.3 seconds. Throws three Boos at once that travel as far and fast as Falcos Laser.
Side B: Mr. Boojangles
Boo creates a copy of himself across the ring, then the too King Boos dash towards eachother, laughing maniacally until they crash into eachother, and the phantom Boo fades. This attack deals 5% damage plus makes the opponent stuck in the ground, the amount of time depends on how much damage they have; the more damage, the more time stuck. The phantom appears about the distance away as Fox's side B. Fast attack, but not quite as fast as Foxs Side B.
Down B: Transparency
King Boo turns invisible, and becomes invincible to all non-element attacks. If an element based attack (fire, ice, electric, water, energy, etc.) he turns back to normal. This effect lasts as long as the user holds the B button after the initial Down B is executed. The player can still move around in this form, however, they cannot dash, jump, dodge, or attack in any way. Also, they cannot pick up items.
Up B: Booregard's Ascendence
King Boo rapidly propels himself in a given direction, via control stick, leaving afterimages of crying Boos in his trail. 5 Boos are left behind him, if they are hit by the opponent, they haunt the opponent, swirling around them in a circle. Each Boo deals 1% damage to the opponent for 3 seconds, for a total of 15 damage if all five Boos are hit. The afterimage Boos only remain for 1.3 seconds, or until they are hit.
Final Smash: The Kings Trump Card
A Giant Bowser Ghost head appears, and King Boo disappears into it. The player then has control of the giant Bowser head, which can fly. B button will fire tiny Ice Balls, which freeze the target for 1.5 seconds while dealing 15% damage. Holding the A button will launch a continuous stream of fire from Bowsers mouth, dealing 10% damage per second for as long as the button is held. The Head stays in play for 12 seconds total. The head is not invincible, however. A strong attack will cause the head to spin around and face the opposite direction.
--------------------------------------------------------
Originally posted by Tragonight
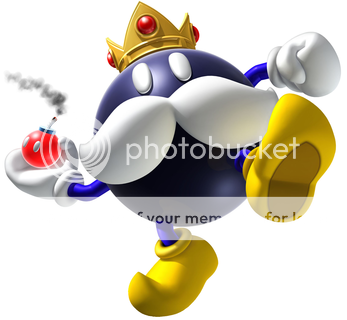
King Bob-omb is a heavy, moderately slow character. He is from the Mario series, and has no real goals. Instead, he tries and stops Mario from accomplishing his.
Neutral B: Bob-omb Explosion
King Bob-omb draws in power from within and uses it to damage opponents. This move can be charged but the charge cannot be carried. After charging for 1 second, King Bob-omb will flash red once. After charging for 2 seconds, he will flash red twice. After charging for 3 seconds, he will flash red three times. And then if the move is charged for 4 seconds or more, he will start flashing red repeatedly and extremely fast. Once the button is released King Bob-omb will emit a big explosion, a bit bigger than his own size. An uncharged version of this move deals 15% damage, and every extra 1 second it is charged will add another 10% to the damage. After 4 seconds King Bob-omb will deal 10% damage to himself, and this damage also grows 10% more every extra 1 second it is charged. The explosion does not change in size and this move can only be charged at a maximum of 6 seconds.
0-1 seconds Charge : Fair knockback
2-3 seconds Charge : Good knockback
4-5 seconds Charge : Great knockback
6 seconds Charge : Super knockback
Side B: Bob-omb Chuck
King Bob-omb pulls out a small Bob-omb and throws it at the opponent. The Bob-ombs explode on impact (which means they cannot be carried and thrown back, only dodged) and travel slowly in an arc over his head. A maximum of three Bob-ombs at a time can be thrown, but do to the slow traveling speed, it can be chained forever if used on the ground. These Bob-omb can be various colors, each doing a different amount of damage.
Pink : 95% Chance : 5% Damage - Little Knockback , No Shield-Breaking Quality
Blue : 4% Chance : 30% Damage - Good Knockback , No Shield-Breaking Quality
Black : 1% Chance : Same amount of damage and knockback as an item Bob-omb
Up B: Bob-omb Grip
King Bob-omb shoots out two narrow lines of Bob-ombs from his hands. This has good vertical range but very little horizontal range. It can be used as a tether, and can latch onto ledges if done correctly. Anyone hit by the line of Bob-ombs will be dragged downward, and meteor spiked down. King Bob-omb then jumps on top of the opponent and pushes his hands down, propelling himself upwards. This move can be used countless times as it never tires him out. Has a bit of an ending lag when used. If an opponent is hit he will finish the move by being in the air, while the opponent is spiked under him. Great damage and good knockback.
Down B: Bob-omb Plant
King Bob-omb takes out a slightly bigger than normal Bob-omb and plants it into the ground. Takes 2 seconds to finish planting, if he is hit while planting it the move will be canceled. 3 seconds after the Bob-omb is planted, it will blow up from the ground. 3 seconds gives King Bob-omb enough time to get away from it, but if he doesn't, the explosion will deal equal damage to him as well as the opponent. If used in the air, King Bob-omb will simply throw the slightly bigger than normal Bob-omb down. It still has the ability to damage the user too if it is used too close to the ground. Good damage and good knockback.
Final Smash: Lord Bob-omb
King Bob-omb will put on a cape and all of his attacks will do double the damage. He also has the ability to glide, by holding the jump button after doing a double-jump. Lord Bob-omb will spread his arms apart and glide slowly, but will not tire out after using an attack. He can jump in midair and continue gliding after using an aerial attack. The chances of his Side B is also flipped around, making it a lot stronger.
Pink : 1% Chance : 5% Damage - Little Knockback , No Shield-Breaking Quality
Blue : 4% Chance : 30% Damage - Good Knockback , No Shield-Breaking Quality
Black : 95% Chance : Same amount of damage and knockback as an item Bob-omb
I made this Final Smash up. I don't think King Bob-omb has ever worn a cape in any of the games he appears in.
A Attacks:
Neutral A: Punches twice across his torso, and then a third time upwards.
Side A: Kicks one of his feet out in front of him. The length of this attack is the length of his legs. (Picture)
Up A: Juts his hands up above his head.
Down A: Punches down with one hand. Able to spike.
Dash Attack: Rolls once while running. Has a bit of an ending lag before he gets up and can attack again.
Side Smash: Brings a Bob-omb out and crushes it with both of his hands. There is no explosion.
Up Smash: Shoves his head upwards, damaging opponents with his crown. Has a sweet spot for knockback at the tip of the crown.
Down Smash: Splits both of his legs out on the ground.
Neutral Aerial: Flips around 360 degrees with his arms and legs extended outwards.
Forward Aerial: Pushes his hand out in a downward arc in front of him.
Back Aerial: Turns around and kicks his foot at the opponent.
Up Aerial: Clasps his hands together above his head.
Down Aerial: Kicks his feet down. This move is slow but will spike.
Grab Attack: Smacks the opponent.
Forward Throw: Rears back and punches the opponent. Good damage and good knockback.
Back Throw: Carries the opponent by their feet and spins around once, then releases them. Little damage and great knockback.
Up Throw: Flips around and kicks the opponent upwards. Fair damage and good knockback.
Down Throw: Jumps and sits on top of the opponent with a lot of force. Great damage and fair knockback.
Ledge Attack: Kicks both of his legs out as he gets up onto the stage.
Stage Entry: A box made of Bob-ombs is on the stage. King Bob-omb breaks out from inside of it.
Up Taunt: A small fire starts near the back of King Bob-omb's foot. Alarmed, he stomps it out with tremendous force.
Down Taunt: He trips and a small Bob-omb falls out of his (pocket?) King Bob-omb catches and puts it away before it touches the ground and blows up.
Side Taunt: King Bob-omb sits down and appears like a oversized, mindless Bob-omb for a second.
Victory Pose 1: King Bob-omb is punching a brick wall. After several attempts to break it, he gives up and smashes his head on it. The wall then breaks.
Victory Pose 2: King Bob-omb puts a Bob-omb in a cannon, and it blasts off. He looks out and tries to find where it went.
--------------------------------------------------------
Legend of Zelda
Masked Link Moveset
Originally posted by Mr. MR
(Note: the original post has more pictures)
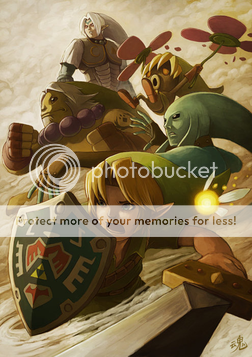
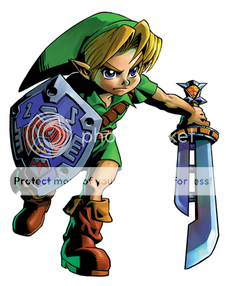
Masked Link is based off of the five Links in Legend of Zelda: Majora’s Mask. Those five are Young Link, Deku Link, Zora Link, Goron Link, and Fierce Deity Link. Each Link has different abilities, strengths, and weaknesses.
On the character selection screen, the title will read Masked Link and four Links (Young Link, Deku Link, Zora Link, and Goron Link) will be in the character display box. You can click one and the name will change to what ever Link you selected. When the match begins, you will begin with the Link you clicked. If nothing was clicked, a random Link will be chosen. The Taunt B’s of each Link below are arranged by lightest (top) and heaviest (bottom), excluding the Link performing the action and Fierce Deity Link. This move also can be performed right after you enter the blast zone, making you respawn as the character you selected. Not pressing anything will make you respawn as the person you entered the blast zone with.
--------------------------------------------------------
Young Link Moveset
Young Link is a lightweight character who does not slide. He cannot wall cling nor crawl. However he does wield a Mirror Shield that blocks projectiles and reflects energy projectiles. It only works if Young Link is standing still. However, in his standing animation he does drop his shield making him vulnerable. Young Link is a little taller than Toon Link. Young Link’s main weapon is his Razor Sword, however he does use his other swords in this moveset.
Neutral B: Hero’s Bow
Young Link fires a fire arrow from his bow. This move can be charged and the charge cannot be carried. The arrow does small damage and good knockback.
Side B: Orange Hookshot
Young Link pulls out his Hookshot with his right hand (also his shielding hand because Young Link is left handed plus this is the hand he uses in the game) and fires it and quickly reels it in. This attack can be tilted and charged, and the charge can be carried. If it hits an opponent then the opponent is knocked back with good knockback. It takes two seconds to fully charge and when fully charged it has a range of a little less than 1/2 of Final Destination. If not charged it only goes a little less than 1/4 of Final Destination. If the hook hits the stage Young Link will be pulled towards the stage very quickly. If one presses the A button while being pulled towards the stage, Young Link will slash his sword.
Up B: Spin Attack
On the ground, Young Link pulls out his gilded sword, charges then spins around dealing good damage and good knockback. Unlike Link’s Up B (not to be confused with any of the Majora’s Mask Links), Young Link’s Up B activates faster and does not perform multiple hits. This attack can be charged but the charge cannot be carried. In the air, Young Link pulls out his Gilded Sword and spins upwards sending Young Link up. The last hit is the most powerful dealing good damage and knockback. This attack exhausts Young Link and has good ledge grab range.
Down B: Deku Mask
Young Link pulls out his Deku Mask and puts it on. In a quick puff of smoke Young Link will transform into Deku Link. This takes about as much time as Super Smash Bros. Melee Zelda/Sheik takes to transform however this move cannot be used in the air. If you use the B Button plus one of the taunt buttons instead of using the control stick, you will transform into a different Link.
Up Taunt: Deku Mask
Young Link pulls out his Deku Mask and puts it on. In a quick puff of smoke Young Link will transform into Deku Link.
Side Taunt: Zora Mask
Young Link pulls out his Zora Mask and puts it on. In a quick puff of smoke Young Link will transform into Zora Link.
Down Taunt: Goron Mask
Young Link pulls out his Goron Mask and puts it on. In a quick puff of smoke Young Link will transform into Goron Link.
Final Smash: Fierce Deity Mask
Young Link will put on the Fierce Deity Mask, and transform into Fierce Deity Link. After 55 seconds, Young Link will take off the mask and return to normal.
Grab: Young Link uses his Hookshot as a grab then retracts it slowly.
Grab Air/Z-air: Young Link fires his Hookshot then retracts it quickly. This attack can be used to attach to the side of the stage and can be used as a recovery. This also deals small damage and knock back.
Pummel: Young Link strikes the opponent with the Razor Sword’s pommel.
Forward Throw: Young Link pushes the opponent forward and slashes with his Razor Sword.
Back Throw: Young Link throws the opponent up and slashes in the back direction.
Up Throw: Young Link throws the opponent up and slashes the opponent as he is coming down.
Down Throw: Young Link throws the opponent on the ground and shield bashes them.
Jab: Young Link slashes his Razor Sword then slashes it again. On the last hit Young Link stabs out his Gilded Sword.
Neutral Air: Young Link quickly swings his Razor Sword in front of him and then behind him.
Side A: Young Link pulls out his Great Fairy Sword, pulls it back (teetering back), and swings. The Great Fairy Sword has excellent range and does great damage and knockback.
Side Tilt: Young Link slashes with his Razor Sword.
Forward Air: Young Link slashes back then forth with his Razor Sword.
Back Air: Young Link quickly spins around and slashes with his Razor Sword.
Up A: Young Link strikes multiple times in the upward direction with his Razor Sword.
Up Tilt: Young Link slashes the space above him with his Razor Sword.
Up Air: Young Link stabs above him with his Gilded Sword.
Down A: Young Link swings his Razor Sword in front of him and then behind him.
Down Tilt/Crouch Attack: Young Link swings his Gilded Sword low. This can spike opponents on the ledge.
Down Air: Young Link stabs the space below him with his Gilded Sword, leaving his sword out and allowing gravity to bring speed to his blade.
Dash Attack: Young Link slashes the space in front of him with his Razor Sword stepping forward.
Ground Attack: Young Link gets on his knees and stabs the space in front of him with his Gilded Sword. Then he gets all the way up and slashes the space behind him with his Razor Sword.
Ledge Attack Under 100%: Young Link throws himself up while slashing with his Razor Sword.
Ledge Attack Over 100%: Young Link pulls himself half way and stabs with his Gilded Sword then pulls himself all the way up.
Stage Entry: Young Link comes running in with a bunny hood on.
Victory Pose #1: Young Link is attack by a red cucco followed by a whole bunch of white ones. Young Link disappears behind a pile of cuccos with the red one on the top.
Victory Pose #2: Young Link is leaning on a cow. The cow is then abducted by “them” and Young Link falls on the ground.
Up Taunt: Young Link puts on a random mask (including some in Ocarina of Time and excluding his transformation masks such as the Giant’s Mask). Doing it again will make Young Link take it off. Putting on a transformation mask will cancel this mask.
Side Taunt: Young Link drinks a bottle of Chateau Romani.
Down Taunt: Young Link plays Zelda’s Lullaby on his Ocarina of Time.
--------------------------------------------------------
Deku Link Moveset

Deku Link is a lightweight character who slides a tad. He cannot wall cling nor crawl but he can skip on water three times then starts to drown. Deku Link is a tad taller than Squirtle.
Neutral B: Bubble Blast
Deku Link blows a magical green Bubble and then releases it. It can be charged but the charged cannot be carried. If charged too long, the bubble explodes dealing no damage to Deku Link. The bubble spins around in a straight line. Fully Charged the Bubble goes half the distance of Final Destination. Once that distance has been traveled the bubble will pop. During its flight, the bubble will have the ability to slow the opponent for five second if the opponent is hit by it. If the opponent is hit while slowed, he will cease being slowed. If the opponent is near when the bubble is popped, it deals good damage and some knockback.
Side B: Deku Spin
Deku Link spins on one foot moving forward. This attack chains (meaning it deals little damage and knockback to keep the opponent in the attack). If performed in the air, Deku Link will not fall but move forward and spin. The spin lasts for one and a half seconds and deals small damage and knockback.
Up B: Deku Flower
Deku Link burrows himself into a Deku Flower (that just appears). The flower releases an explosion launching Deku Link in the air. The explosion deals great damage and knockback. If fully charged, the explosion deals great damage and amazing knockback (depends how close the opponent is). The flower will fall downwards. The falling Deku Flower will damage opponents in its path. If it hits the ground, the flower will stay there for five second, making it a good projectile shield but when Deku Link uses his Up B again, any existing flower that you created will disappear. This attack can be charged but the charge cannot carry. When launched in the air, Deku Link will be holding two spinning flowers (which will keep him floating in the air). If you press down the flowers fold sending Deku Link downward and exhausted. When you press up when he is exhausted, the flowers will be back to normal but not spinning. When the flowers are spinning, Deku Link can float greater horizontal distances. When the flowers are not spinning Deku Link will glide slowly down. When Deku Link has flowers in his hand, only one attack can be used: Down Air. There are many different colors of Deku flowers that can appear.
Down B: Zora Mask
Young Link pulls out his Zora Mask and puts it on. In a quick puff of smoke Deku Link will transform into Zora Link. This takes about as much time as Super Smash Bros. Melee Zelda/Sheik takes to transform however this move cannot be used in the air. If you use the B Button plus one of the taunt buttons instead of using the control stick, you will transform into a different Link.
Up Taunt: Maskless
Deku Link will take off his mask and in a quick puff of smoke will transform into Young Link.
Side Taunt: Zora Mask
Deku Link pulls out his Zora Mask and puts it on. In a quick puff of smoke Deku Link will transform into Zora Link.
Down Taunt: Goron Mask
Deku Link pulls out his Goron Mask and puts it on. In a quick puff of smoke Deku Link will transform into Goron Link.
Final Smash: Fierce Deity Mask
Deku Link will put on the Fierce Deity Mask, and transform into Fierce Deity Link. After 55 seconds, Deku Link will take off the mask and return to normal.
Pummel: Deku Link kicks the opponent in the shin.
Forward Throw: Deku Link jumps up and kicks them.
Back Throw: Deku Link trips the enemy by sliding under him, then jumps and kicks them from behind.
Up Throw: Deku Link headbutts the opponent up.
Down Throw: Deku Link throws the opponent on the ground and spins on top of him.
Jab: Deku Link bends down and headbutts like Pikachu.
Neutral Air: Deku Link flips hitting the space around him with his hat.
Side A: Deku Link lunges forward with a headbutt.
Side Tilt: Deku Link whacks the space in front of him with the tip of his hat.
Forward Air: Deku Link kicks his legs forward.
Back Air: Deku Link kicks his legs backwards.
Up A: Deku Link fires a Deku Nut up. If the opponent is hit by the Deku Nut on the ground, the Deku Nut will explode stunning the opponent for two seconds and dealing good damage. If the opponent is hit by the Deku Nut in the air, the Deku Nut explosion will deal good damage and knockback. The Deku Nut does not go very high up.
Up Tilt: Deku Link jumps up headbutting the space above him.
Up Air: Deku Link will jerk his head up so his hat strikes the space above him.
Down A: Deku Link spins in place once swinging his hat around.
Down Tilt/Crouch Attack: Similar to Olimar’s Down Tilt, Deku Link will lay himself out with hands in front of him and scrunch back up.
Down Air: Deku Link throws a Deku Nut downwards. If the opponent is hit by the Deku Nut on the ground, the Deku Nut will explode stunning the opponent for two seconds and dealing good damage. If the opponent is hit by the Deku Nut in the air, the Deku Nut explosion will deal good damage and knockback.
Dash Attack: Deku Link rams his head in the space in front of him.
Ground Attack: Deku Link kicks in front of him with both legs held up by his hands. Then he kicks behind him held up by both hands and stands up.
Ledge Attack Under 100%: Deku Link jumps up swinging his hat.
Ledge Attack Over 100%: Deku Link pulls himself up and kicks under the opponent.
Stage Entry: Deku Link will pop out of a Deku Flower.
Victory Pose #1: Deku Link is chased by the Clock Town Square Dog in circles.
Victory Pose #2: Deku Link takes off his mask turning into Young Link. He then holds his Deku mask by his face.
Up Taunt: Deku Link pulls out a Deku Nut. He then throws it from hand to hand. He then drops it and stuns himself for a split second.
Side Taunt: Talt and Tael appear. Tatl pushes Deku Link making him real back and Tael pushes him over. Talt and Tael both laugh and spin around Deku Link in joy.
Down Taunt: Deku Link plays the Song of Time on his Pipes of Awakening.
--------------------------------------------------------
Zora Link Moveset
Zora Link is a medium weight character who does not slide. He can wall cling but not crawl. He is also and excellent and fast swimmer and can use his Up B and his aerials in water. Zora Link is just as tall as Link (not to be confused with Young Link).
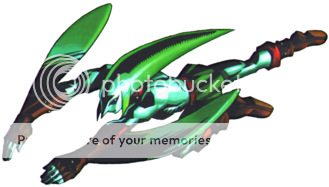
Neutral B: Double Cutter Boomerang
Zora Link crosses his arms then lets his Double Cutters loose. They spin around and come back quickly. This move can be charged and the charge can be held. When fully charged it can travel half the distance of Final Destination. When not charged at all, his Double Cutters can travel 1/4 the distance of Final Destination. This attack can be angled too. It takes two seconds to fully charge. Boomerang deal good damage and small knockback.
Side B: Flip Kick
In Majora’s Mask, if you pressed A while his Boomerang was flying, Zora performed a Flip Kick. Here, Flip Kick can be performed by pressing Side B weather Zora Link’s Boomerang is out or not. When performed, Zora Link rushes forward, jumps, flips, and kicks. This attack can be used in the air giving Zora Link horizontal momentum. This attack deals good damage and great knockback.
Up B: Bio-Electrical Barrier
If this is performed in the air, Zora Link pause in the air for a moment (press a direction), then soars in the direction that was pressed surrounded by an electrical cone. The electricity does good damage and knockback. When performed on the ground, Zora Link will use his one of his Double Cutters as a shield. This will also surround Zora Link in a halved and upside-down electrical cone. The electricity does good damage and knockback if the opponent is touching it. However, it does take one hit to break. If the electrical barrier is broken, Zora Link will still be shielding protecting him. Performing it in the water is the same as performing it in the air. The Bio-Electrical Barrier in any form can reflect projectiles. This will exhaust Zora Link when used in the air.
Down B: Goron Mask
Zora Link pulls out his Goron Mask and puts it on. In a quick puff of smoke Zora Link will transform into Goron Link. This takes about as much time as Super Smash Bros. Melee Zelda/Sheik takes to transform however this move cannot be used in the air. If you use the B Button plus one of the taunt buttons instead of using the control stick, you will transform into a different Link.
Up Taunt: Deku Mask
Zora Link pulls out his Deku Mask and puts it on. In a quick puff of smoke Zora Link will transform into Deku Link.
Side Taunt: Maskless
Zora Link will take off his mask and in a quick puff of smoke will transform into Young Link.
Down Taunt: Goron Mask
Zora Link pulls out his Goron Mask and puts it on. In a quick puff of smoke Zora Link will transform into Goron Link.
Final Smash: Fierce Deity Mask
Zora Link will put on the Fierce Deity Mask, and transform into Fierce Deity Link. After 55 seconds, Zora Link will take off the mask and return to normal.
Pummel: Zora Link punches the opponent in the gut.
Forward Throw: Zora Link spin kicks the opponent forward.
Back Throw: Zora Link throws the opponent behind him and spin kicks him.
Up Throw: Zora Link uppercuts the opponent then slashes him with his other arm.
Down Throw: Zora Link throws the opponent on the ground and slashes him three times. The last slash sends the opponent up.
Jab: Zora Link punches, then slashes with his other arm, and then kicks the opponent.
Neutral Air: Zora Link slashes with one of his Double Cutters then the other.
Side A: Zora Link spin kicks. His foot is covered in bioelectricity.
Side Tilt: Zora Link slashes the air in front of him with his Double Cutters at the same time.
Forward Air: Zora Link swings his Guitar of Waves from down to up at an angle.
Back Air: Zora Link kicks the air behind him.
Up A: Zora Link slashes the air above him with one of his Double Cutters covered in bioelectricity.
Up Tilt: Zora Link high kicks.
Up Air: Zora Link flip kicks the space above him.
Down A: Zora Link spins on his back while kicking.
Down Tilt/Crouch Attack: Zora Link slashes one of his Double Cutters at the opponent’s legs.
Down Air: Zora Link kicks both feet down (spike).
Dash Attack: Zora Link slashes the space in front of him with one of his Double Cutters still moving forward from down to up. Then he spins around jabs with his other arms elbow.
Ground Attack: Zora Link performs a kick up.
Ledge Attack Under 100%: Zora Link throws himself up while slashing with one of his Double Cutters.
Ledge Attack Over 100%: Zora Link pulls himself halfway. He then flips onto the stage striking with one of feet.
Stage Entry: Zora Link appears in a cloud of feathers from playing the Song of Soaring. He will have his Guitar of Waves in hand.
Victory Pose #1: Zora Link plays his Guitar of Waves rockstar style.
Victory Pose #2: Zora Link takes off his mask turning into Young Link. He then holds his Zora mask by his face.
Up Taunt: Zora Link raises his Guitar of Waves above his head.
Side Taunt: Zora Link performs a back flip then a forward flip.
Down Taunt: Zora Link plays Song of Storms on his Guitar of Waves. A small storm cloud appears above him only and starts to rain on him.
--------------------------------------------------------
Goron Link Moveset
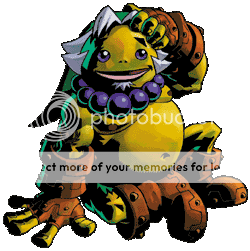
Goron Link is a heavyweight character who slides a tad. He cannot wall cling nor crawl. He also cannot swim, sinks slowly in water, and cannot grab the ledge when he is in ball mode. Goron Link is approximately the size and height of Bowser.
Neutral B: Goron Roll
Goron Link rolls into a ball charges up then speeds in the direction you were facing. This move can be charged but the charge cannot be carried. If charged long enough, spikes will poke out of Goron Link. Since Goron Link cannot fly, he cannot roll off the edge. Goron Link will start to slow down when he rolls. When fully charged this attack does great damage and amazing knockback.
Side B: Bomb Throw
Goron Link throws a Bomb Flower or a Powder Keg. This attack has a very low chance of throwing a Powder Keg. The Bomb Flower will explode on impact but the Powder Keg will explode only if it is a person. If the Powder Keg hits the ground it will bounce once then roll in the direction it was done. The Bomb Flower has good damage and knockback while the Powder Keg has great damage and amazing knockback.
Up B: Goron Ground Pound
Goron Link rolls into a ball and jumps high into the air. Holding either left or right before he reaches the top will make Goron Link move in that direction slightly. This attack does small damage and knockback. If you move the control stick in a circle, Goron Link will exit ball form and be exhausted. On impact with the ground, a small wave will deal small damage to opponents. If the opponent is under Goron Link, he will receive good damage and will be knocked back greatly.
Down B: Maskless
Goron Link will take off his mask and in a quick puff of smoke will transform into Young Link. This takes about as much time as Super Smash Bros. Melee Zelda/Sheik takes to transform however this move cannot be used in the air. If you use the B Button plus one of the taunt buttons instead of using the control stick, you will transform into a different Link.
Up Taunt: Deku Mask
Goron Link pulls out his Deku Mask and puts it on. In a quick puff of smoke Goron Link will transform into Deku Link.
Side Taunt: Maskless
Goron Link will take off his mask and in a quick puff of smoke will transform into Young Link.
Down Taunt: Zora Mask
Goron Link pulls out his Zora Mask and puts it on. In a quick puff of smoke Goron Link will transform into Zora Link.
Final Smash: Fierce Deity Mask
Goron Link will put on the Fierce Deity Mask, and transform into Fierce Deity Link. After 55 seconds, Goron Link will take off the mask and return to normal.
Pummel: Goron Link headbutts the opponent.
Forward Throw: Goron Link throws the opponent down and sits on them.
Back Throw: Goron Link his the opponent backwards with his rear.
Up Throw: Goron Link throws the opponent up, curls into a ball then launches himself up knocking the opponent up.
Down Throw: Goron Link throws the opponent down, and jumps. He then curls up into a ball and starts to spin clockwise very fast. When he lands on the opponent, the opponent is launched backwards.
Jab: Goron Link throws a punch, then a hook, and then his rear.
Neutral Air: Goron Link curls up into a ball and spins around.
Side A: Goron Link pulls back his fist and lets fly a punch covered in flames.
Side Tilt: Goron Link shoulder tackles the opponent.
Forward Air: Goron Link punches down to up. His fist is covered in flames.
Back Air: Goron Link kicks behind him with both feet.
Up A: Goron Link will curl up into a ball and jump.
Up Tilt: Goron Link swings an open palm over his head.
Up Air: Goron Link headbutts above him.
Down A: Goron Link brings his two fists above him then brings then down on both sides of him.
Down Tilt/Crouch Attack: Goron Link kicks forward.
Down Air: Goron Link drops down really fast.
Dash Attack: Goron Link rolls into a ball covered in flames still moving forward.
Ground Attack: Goron Link quickly rolls around in a circle and gets up.
Ledge Attack Under 100%: Goron Link pulls himself up using the momentum to ram his body in the space in front of the ledge.
Ledge Attack Over 100%: Goron Link pulls himself halfway up, punches then pulls himself all the way up.
Stage Entry: Goron Link rolls in.
Victory Pose #1: Goron Link does the Darunia Dance.
Victory Pose #2: Goron Link takes off his mask turning into Young Link. He then holds his Goron mask by his face.
Up Taunt: Goron Link does the Darunia Dance (I am coping from above because of its classiness).
Side Taunt: Goron Link will roll into a ball and rock back and forth.
Down Taunt: Goron Link plays Saria’s Song on his Drums of Sleep.
--------------------------------------------------------
Fierce Deity Link Moveset
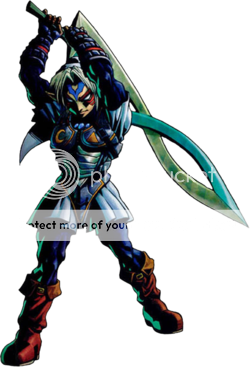
Fierce Deity Link is a heavyweight character who does not slide at all. He can wall cling but cannot crawl. Fierce Deity Link is taller than Link (not to be confused with Young Link). Fierce Deity Link uses the Double Helix Sword. Because the Double Helix Sword is a two-handed weapon, he cannot wield a shield. However all damage dealt him is halved and all knockback is negated.
Neutral B: Hero’s Bow
Fierce Deity Link fires an ice arrow from his bow. Any opponent near the flight of the arrow or impact will be frozen. This move can be charged but the charge cannot be carried. The arrow does good damage and great knockback.
Side B: Sword Beam
Fierce Deity Link stabs the space in front of him and channels his magical energy into his double helix sword sending out a continuous beam of energy. This attack can be tilted and explodes on impact dealing great damage and great knockback.
Up B: Spin Attack
On the ground, Fierce Deity charges his sword, then spins around dealing great damage and amazing knockback. This attack also sends a fire wave from Fierce Deity Link. This attack can be charged but the charge cannot be carried. In the air, Fierce Deity Link spins upward and lifted up. The last hit is the most powerful dealing great damage and amazing knockback.
Down B: Powder Keg
Fierce Deity Link pulls out a small Powder Keg. It can be thrown in any direction and explodes on impact dealing great damage and amazing knockback.
Tilted Down B: Bombchu
Fierce Deity Link pulls out a Bombchu. It can be thrown in any direction and explodes on impact. If it hits the ground it will travel around the stage like a Hothead until it hits something or until the Final Smash runs out.
Grab: Fierce Deity Link uses his Hookshot as a grab then retracts it quickly.
Grab Air/Z-air: Fierce Deity Link fires his Hookshot then retracts it quickly. This attack can be used to attach to the side of the stage as well as deal good damage and knock back.
Pummel: Fierce Deity Link knees the opponent in the gut.
Forward Throw: Fierce Deity Link kicks the opponent forward.
Back Throw: Fierce Deity Link spins and kicks the opponent.
Up Throw: Fierce Deity Link throws the opponent up and slashes him.
Down Throw: Fierce Deity Link throws opponent on the ground and uses his Sword Beam.
Jab: Fierce Deity Link slashes his sword and then slashes his sword again. Finally he jabs his sword out.
Neutral Air: Fierce Deity Link holds a kick.
Side A: Fierce Deity Link swings his sword from up to down. If A is pressed again, then he swings back up.
Side Tilt: Fierce Deity Link spin kicks.
Forward Air: Fierce Deity Link slashes with his sword back then forth.
Back Air: Fierce Deity Link swings his sword below him and to behind him in one motion.
Up A: Fierce Deity Link strongly slashes above him.
Up Tilt: Fierce Deity Link swings his sword above him.
Up Air: Fierce Deity Link stabs his sword up and keeps it there.
Down A: Fierce Deity Link slashes the space in front of him and behind him in two motions.
Down Tilt/Crouch Attack: Fierce Deity Link sweeps his sword under the opponent’s feet. This can spike if the opponent is on the ledge.
Down Air: Fierce Deity Link stabs the space below him leaving his sword out and allowing gravity to bring speed to his blade.
Dash Attack: Fierce Deity Link slashes the space in front of him.
Ground Attack: Fierce Deity Link stands up and releases a wave of energy.
Ledge Attack Under 100%: Fierce Deity Link jumps up flips and strikes with sword.
Ledge Attack Over 100%: Fierce Deity Link pulls himself up and stabs.
Victory Pose #1: Fierce Deity Link points his sword at the screen with energy coming off his blade.
Victory Pose #2: Fierce Deity Link takes off his mask and Young Link is standing there holding the Fierce Deity Mask by his face.
Up Taunt: Fierce Deity Link points his blade upwards and fires a small Sword Beam that actually does damage.
Side Taunt: Fierce Deity Link pulls out Majora’s Mask looks at it and puts it back.
Down Taunt: Fierce Deity Link holds his blade with two hands and rams it into the ground with power coming of the blade and electricity coming out the whole in the ground.
--------------------------------------------------------
--------------------------------------------------------
(Note: the original post has more pictures)
Masked Link is based off of the five Links in Legend of Zelda: Majora’s Mask. Those five are Young Link, Deku Link, Zora Link, Goron Link, and Fierce Deity Link. Each Link has different abilities, strengths, and weaknesses.
On the character selection screen, the title will read Masked Link and four Links (Young Link, Deku Link, Zora Link, and Goron Link) will be in the character display box. You can click one and the name will change to what ever Link you selected. When the match begins, you will begin with the Link you clicked. If nothing was clicked, a random Link will be chosen. The Taunt B’s of each Link below are arranged by lightest (top) and heaviest (bottom), excluding the Link performing the action and Fierce Deity Link. This move also can be performed right after you enter the blast zone, making you respawn as the character you selected. Not pressing anything will make you respawn as the person you entered the blast zone with.
--------------------------------------------------------
Young Link Moveset
Young Link is a lightweight character who does not slide. He cannot wall cling nor crawl. However he does wield a Mirror Shield that blocks projectiles and reflects energy projectiles. It only works if Young Link is standing still. However, in his standing animation he does drop his shield making him vulnerable. Young Link is a little taller than Toon Link. Young Link’s main weapon is his Razor Sword, however he does use his other swords in this moveset.
Neutral B: Hero’s Bow
Young Link fires a fire arrow from his bow. This move can be charged and the charge cannot be carried. The arrow does small damage and good knockback.
Side B: Orange Hookshot
Young Link pulls out his Hookshot with his right hand (also his shielding hand because Young Link is left handed plus this is the hand he uses in the game) and fires it and quickly reels it in. This attack can be tilted and charged, and the charge can be carried. If it hits an opponent then the opponent is knocked back with good knockback. It takes two seconds to fully charge and when fully charged it has a range of a little less than 1/2 of Final Destination. If not charged it only goes a little less than 1/4 of Final Destination. If the hook hits the stage Young Link will be pulled towards the stage very quickly. If one presses the A button while being pulled towards the stage, Young Link will slash his sword.
Up B: Spin Attack
On the ground, Young Link pulls out his gilded sword, charges then spins around dealing good damage and good knockback. Unlike Link’s Up B (not to be confused with any of the Majora’s Mask Links), Young Link’s Up B activates faster and does not perform multiple hits. This attack can be charged but the charge cannot be carried. In the air, Young Link pulls out his Gilded Sword and spins upwards sending Young Link up. The last hit is the most powerful dealing good damage and knockback. This attack exhausts Young Link and has good ledge grab range.
Down B: Deku Mask
Young Link pulls out his Deku Mask and puts it on. In a quick puff of smoke Young Link will transform into Deku Link. This takes about as much time as Super Smash Bros. Melee Zelda/Sheik takes to transform however this move cannot be used in the air. If you use the B Button plus one of the taunt buttons instead of using the control stick, you will transform into a different Link.
Up Taunt: Deku Mask
Young Link pulls out his Deku Mask and puts it on. In a quick puff of smoke Young Link will transform into Deku Link.
Side Taunt: Zora Mask
Young Link pulls out his Zora Mask and puts it on. In a quick puff of smoke Young Link will transform into Zora Link.
Down Taunt: Goron Mask
Young Link pulls out his Goron Mask and puts it on. In a quick puff of smoke Young Link will transform into Goron Link.
Final Smash: Fierce Deity Mask
Young Link will put on the Fierce Deity Mask, and transform into Fierce Deity Link. After 55 seconds, Young Link will take off the mask and return to normal.
Grab: Young Link uses his Hookshot as a grab then retracts it slowly.
Grab Air/Z-air: Young Link fires his Hookshot then retracts it quickly. This attack can be used to attach to the side of the stage and can be used as a recovery. This also deals small damage and knock back.
Pummel: Young Link strikes the opponent with the Razor Sword’s pommel.
Forward Throw: Young Link pushes the opponent forward and slashes with his Razor Sword.
Back Throw: Young Link throws the opponent up and slashes in the back direction.
Up Throw: Young Link throws the opponent up and slashes the opponent as he is coming down.
Down Throw: Young Link throws the opponent on the ground and shield bashes them.
Jab: Young Link slashes his Razor Sword then slashes it again. On the last hit Young Link stabs out his Gilded Sword.
Neutral Air: Young Link quickly swings his Razor Sword in front of him and then behind him.
Side A: Young Link pulls out his Great Fairy Sword, pulls it back (teetering back), and swings. The Great Fairy Sword has excellent range and does great damage and knockback.
Side Tilt: Young Link slashes with his Razor Sword.
Forward Air: Young Link slashes back then forth with his Razor Sword.
Back Air: Young Link quickly spins around and slashes with his Razor Sword.
Up A: Young Link strikes multiple times in the upward direction with his Razor Sword.
Up Tilt: Young Link slashes the space above him with his Razor Sword.
Up Air: Young Link stabs above him with his Gilded Sword.
Down A: Young Link swings his Razor Sword in front of him and then behind him.
Down Tilt/Crouch Attack: Young Link swings his Gilded Sword low. This can spike opponents on the ledge.
Down Air: Young Link stabs the space below him with his Gilded Sword, leaving his sword out and allowing gravity to bring speed to his blade.
Dash Attack: Young Link slashes the space in front of him with his Razor Sword stepping forward.
Ground Attack: Young Link gets on his knees and stabs the space in front of him with his Gilded Sword. Then he gets all the way up and slashes the space behind him with his Razor Sword.
Ledge Attack Under 100%: Young Link throws himself up while slashing with his Razor Sword.
Ledge Attack Over 100%: Young Link pulls himself half way and stabs with his Gilded Sword then pulls himself all the way up.
Stage Entry: Young Link comes running in with a bunny hood on.
Victory Pose #1: Young Link is attack by a red cucco followed by a whole bunch of white ones. Young Link disappears behind a pile of cuccos with the red one on the top.
Victory Pose #2: Young Link is leaning on a cow. The cow is then abducted by “them” and Young Link falls on the ground.
Up Taunt: Young Link puts on a random mask (including some in Ocarina of Time and excluding his transformation masks such as the Giant’s Mask). Doing it again will make Young Link take it off. Putting on a transformation mask will cancel this mask.
Side Taunt: Young Link drinks a bottle of Chateau Romani.
Down Taunt: Young Link plays Zelda’s Lullaby on his Ocarina of Time.
--------------------------------------------------------
Deku Link is a lightweight character who slides a tad. He cannot wall cling nor crawl but he can skip on water three times then starts to drown. Deku Link is a tad taller than Squirtle.
Neutral B: Bubble Blast
Deku Link blows a magical green Bubble and then releases it. It can be charged but the charged cannot be carried. If charged too long, the bubble explodes dealing no damage to Deku Link. The bubble spins around in a straight line. Fully Charged the Bubble goes half the distance of Final Destination. Once that distance has been traveled the bubble will pop. During its flight, the bubble will have the ability to slow the opponent for five second if the opponent is hit by it. If the opponent is hit while slowed, he will cease being slowed. If the opponent is near when the bubble is popped, it deals good damage and some knockback.
Side B: Deku Spin
Deku Link spins on one foot moving forward. This attack chains (meaning it deals little damage and knockback to keep the opponent in the attack). If performed in the air, Deku Link will not fall but move forward and spin. The spin lasts for one and a half seconds and deals small damage and knockback.
Up B: Deku Flower
Deku Link burrows himself into a Deku Flower (that just appears). The flower releases an explosion launching Deku Link in the air. The explosion deals great damage and knockback. If fully charged, the explosion deals great damage and amazing knockback (depends how close the opponent is). The flower will fall downwards. The falling Deku Flower will damage opponents in its path. If it hits the ground, the flower will stay there for five second, making it a good projectile shield but when Deku Link uses his Up B again, any existing flower that you created will disappear. This attack can be charged but the charge cannot carry. When launched in the air, Deku Link will be holding two spinning flowers (which will keep him floating in the air). If you press down the flowers fold sending Deku Link downward and exhausted. When you press up when he is exhausted, the flowers will be back to normal but not spinning. When the flowers are spinning, Deku Link can float greater horizontal distances. When the flowers are not spinning Deku Link will glide slowly down. When Deku Link has flowers in his hand, only one attack can be used: Down Air. There are many different colors of Deku flowers that can appear.
Down B: Zora Mask
Young Link pulls out his Zora Mask and puts it on. In a quick puff of smoke Deku Link will transform into Zora Link. This takes about as much time as Super Smash Bros. Melee Zelda/Sheik takes to transform however this move cannot be used in the air. If you use the B Button plus one of the taunt buttons instead of using the control stick, you will transform into a different Link.
Up Taunt: Maskless
Deku Link will take off his mask and in a quick puff of smoke will transform into Young Link.
Side Taunt: Zora Mask
Deku Link pulls out his Zora Mask and puts it on. In a quick puff of smoke Deku Link will transform into Zora Link.
Down Taunt: Goron Mask
Deku Link pulls out his Goron Mask and puts it on. In a quick puff of smoke Deku Link will transform into Goron Link.
Final Smash: Fierce Deity Mask
Deku Link will put on the Fierce Deity Mask, and transform into Fierce Deity Link. After 55 seconds, Deku Link will take off the mask and return to normal.
Pummel: Deku Link kicks the opponent in the shin.
Forward Throw: Deku Link jumps up and kicks them.
Back Throw: Deku Link trips the enemy by sliding under him, then jumps and kicks them from behind.
Up Throw: Deku Link headbutts the opponent up.
Down Throw: Deku Link throws the opponent on the ground and spins on top of him.
Jab: Deku Link bends down and headbutts like Pikachu.
Neutral Air: Deku Link flips hitting the space around him with his hat.
Side A: Deku Link lunges forward with a headbutt.
Side Tilt: Deku Link whacks the space in front of him with the tip of his hat.
Forward Air: Deku Link kicks his legs forward.
Back Air: Deku Link kicks his legs backwards.
Up A: Deku Link fires a Deku Nut up. If the opponent is hit by the Deku Nut on the ground, the Deku Nut will explode stunning the opponent for two seconds and dealing good damage. If the opponent is hit by the Deku Nut in the air, the Deku Nut explosion will deal good damage and knockback. The Deku Nut does not go very high up.
Up Tilt: Deku Link jumps up headbutting the space above him.
Up Air: Deku Link will jerk his head up so his hat strikes the space above him.
Down A: Deku Link spins in place once swinging his hat around.
Down Tilt/Crouch Attack: Similar to Olimar’s Down Tilt, Deku Link will lay himself out with hands in front of him and scrunch back up.
Down Air: Deku Link throws a Deku Nut downwards. If the opponent is hit by the Deku Nut on the ground, the Deku Nut will explode stunning the opponent for two seconds and dealing good damage. If the opponent is hit by the Deku Nut in the air, the Deku Nut explosion will deal good damage and knockback.
Dash Attack: Deku Link rams his head in the space in front of him.
Ground Attack: Deku Link kicks in front of him with both legs held up by his hands. Then he kicks behind him held up by both hands and stands up.
Ledge Attack Under 100%: Deku Link jumps up swinging his hat.
Ledge Attack Over 100%: Deku Link pulls himself up and kicks under the opponent.
Stage Entry: Deku Link will pop out of a Deku Flower.
Victory Pose #1: Deku Link is chased by the Clock Town Square Dog in circles.
Victory Pose #2: Deku Link takes off his mask turning into Young Link. He then holds his Deku mask by his face.
Up Taunt: Deku Link pulls out a Deku Nut. He then throws it from hand to hand. He then drops it and stuns himself for a split second.
Side Taunt: Talt and Tael appear. Tatl pushes Deku Link making him real back and Tael pushes him over. Talt and Tael both laugh and spin around Deku Link in joy.
Down Taunt: Deku Link plays the Song of Time on his Pipes of Awakening.
--------------------------------------------------------
Zora Link is a medium weight character who does not slide. He can wall cling but not crawl. He is also and excellent and fast swimmer and can use his Up B and his aerials in water. Zora Link is just as tall as Link (not to be confused with Young Link).
Neutral B: Double Cutter Boomerang
Zora Link crosses his arms then lets his Double Cutters loose. They spin around and come back quickly. This move can be charged and the charge can be held. When fully charged it can travel half the distance of Final Destination. When not charged at all, his Double Cutters can travel 1/4 the distance of Final Destination. This attack can be angled too. It takes two seconds to fully charge. Boomerang deal good damage and small knockback.
Side B: Flip Kick
In Majora’s Mask, if you pressed A while his Boomerang was flying, Zora performed a Flip Kick. Here, Flip Kick can be performed by pressing Side B weather Zora Link’s Boomerang is out or not. When performed, Zora Link rushes forward, jumps, flips, and kicks. This attack can be used in the air giving Zora Link horizontal momentum. This attack deals good damage and great knockback.
Up B: Bio-Electrical Barrier
If this is performed in the air, Zora Link pause in the air for a moment (press a direction), then soars in the direction that was pressed surrounded by an electrical cone. The electricity does good damage and knockback. When performed on the ground, Zora Link will use his one of his Double Cutters as a shield. This will also surround Zora Link in a halved and upside-down electrical cone. The electricity does good damage and knockback if the opponent is touching it. However, it does take one hit to break. If the electrical barrier is broken, Zora Link will still be shielding protecting him. Performing it in the water is the same as performing it in the air. The Bio-Electrical Barrier in any form can reflect projectiles. This will exhaust Zora Link when used in the air.
Down B: Goron Mask
Zora Link pulls out his Goron Mask and puts it on. In a quick puff of smoke Zora Link will transform into Goron Link. This takes about as much time as Super Smash Bros. Melee Zelda/Sheik takes to transform however this move cannot be used in the air. If you use the B Button plus one of the taunt buttons instead of using the control stick, you will transform into a different Link.
Up Taunt: Deku Mask
Zora Link pulls out his Deku Mask and puts it on. In a quick puff of smoke Zora Link will transform into Deku Link.
Side Taunt: Maskless
Zora Link will take off his mask and in a quick puff of smoke will transform into Young Link.
Down Taunt: Goron Mask
Zora Link pulls out his Goron Mask and puts it on. In a quick puff of smoke Zora Link will transform into Goron Link.
Final Smash: Fierce Deity Mask
Zora Link will put on the Fierce Deity Mask, and transform into Fierce Deity Link. After 55 seconds, Zora Link will take off the mask and return to normal.
Pummel: Zora Link punches the opponent in the gut.
Forward Throw: Zora Link spin kicks the opponent forward.
Back Throw: Zora Link throws the opponent behind him and spin kicks him.
Up Throw: Zora Link uppercuts the opponent then slashes him with his other arm.
Down Throw: Zora Link throws the opponent on the ground and slashes him three times. The last slash sends the opponent up.
Jab: Zora Link punches, then slashes with his other arm, and then kicks the opponent.
Neutral Air: Zora Link slashes with one of his Double Cutters then the other.
Side A: Zora Link spin kicks. His foot is covered in bioelectricity.
Side Tilt: Zora Link slashes the air in front of him with his Double Cutters at the same time.
Forward Air: Zora Link swings his Guitar of Waves from down to up at an angle.
Back Air: Zora Link kicks the air behind him.
Up A: Zora Link slashes the air above him with one of his Double Cutters covered in bioelectricity.
Up Tilt: Zora Link high kicks.
Up Air: Zora Link flip kicks the space above him.
Down A: Zora Link spins on his back while kicking.
Down Tilt/Crouch Attack: Zora Link slashes one of his Double Cutters at the opponent’s legs.
Down Air: Zora Link kicks both feet down (spike).
Dash Attack: Zora Link slashes the space in front of him with one of his Double Cutters still moving forward from down to up. Then he spins around jabs with his other arms elbow.
Ground Attack: Zora Link performs a kick up.
Ledge Attack Under 100%: Zora Link throws himself up while slashing with one of his Double Cutters.
Ledge Attack Over 100%: Zora Link pulls himself halfway. He then flips onto the stage striking with one of feet.
Stage Entry: Zora Link appears in a cloud of feathers from playing the Song of Soaring. He will have his Guitar of Waves in hand.
Victory Pose #1: Zora Link plays his Guitar of Waves rockstar style.
Victory Pose #2: Zora Link takes off his mask turning into Young Link. He then holds his Zora mask by his face.
Up Taunt: Zora Link raises his Guitar of Waves above his head.
Side Taunt: Zora Link performs a back flip then a forward flip.
Down Taunt: Zora Link plays Song of Storms on his Guitar of Waves. A small storm cloud appears above him only and starts to rain on him.
--------------------------------------------------------
Goron Link is a heavyweight character who slides a tad. He cannot wall cling nor crawl. He also cannot swim, sinks slowly in water, and cannot grab the ledge when he is in ball mode. Goron Link is approximately the size and height of Bowser.
Neutral B: Goron Roll
Goron Link rolls into a ball charges up then speeds in the direction you were facing. This move can be charged but the charge cannot be carried. If charged long enough, spikes will poke out of Goron Link. Since Goron Link cannot fly, he cannot roll off the edge. Goron Link will start to slow down when he rolls. When fully charged this attack does great damage and amazing knockback.
Side B: Bomb Throw
Goron Link throws a Bomb Flower or a Powder Keg. This attack has a very low chance of throwing a Powder Keg. The Bomb Flower will explode on impact but the Powder Keg will explode only if it is a person. If the Powder Keg hits the ground it will bounce once then roll in the direction it was done. The Bomb Flower has good damage and knockback while the Powder Keg has great damage and amazing knockback.
Up B: Goron Ground Pound
Goron Link rolls into a ball and jumps high into the air. Holding either left or right before he reaches the top will make Goron Link move in that direction slightly. This attack does small damage and knockback. If you move the control stick in a circle, Goron Link will exit ball form and be exhausted. On impact with the ground, a small wave will deal small damage to opponents. If the opponent is under Goron Link, he will receive good damage and will be knocked back greatly.
Down B: Maskless
Goron Link will take off his mask and in a quick puff of smoke will transform into Young Link. This takes about as much time as Super Smash Bros. Melee Zelda/Sheik takes to transform however this move cannot be used in the air. If you use the B Button plus one of the taunt buttons instead of using the control stick, you will transform into a different Link.
Up Taunt: Deku Mask
Goron Link pulls out his Deku Mask and puts it on. In a quick puff of smoke Goron Link will transform into Deku Link.
Side Taunt: Maskless
Goron Link will take off his mask and in a quick puff of smoke will transform into Young Link.
Down Taunt: Zora Mask
Goron Link pulls out his Zora Mask and puts it on. In a quick puff of smoke Goron Link will transform into Zora Link.
Final Smash: Fierce Deity Mask
Goron Link will put on the Fierce Deity Mask, and transform into Fierce Deity Link. After 55 seconds, Goron Link will take off the mask and return to normal.
Pummel: Goron Link headbutts the opponent.
Forward Throw: Goron Link throws the opponent down and sits on them.
Back Throw: Goron Link his the opponent backwards with his rear.
Up Throw: Goron Link throws the opponent up, curls into a ball then launches himself up knocking the opponent up.
Down Throw: Goron Link throws the opponent down, and jumps. He then curls up into a ball and starts to spin clockwise very fast. When he lands on the opponent, the opponent is launched backwards.
Jab: Goron Link throws a punch, then a hook, and then his rear.
Neutral Air: Goron Link curls up into a ball and spins around.
Side A: Goron Link pulls back his fist and lets fly a punch covered in flames.
Side Tilt: Goron Link shoulder tackles the opponent.
Forward Air: Goron Link punches down to up. His fist is covered in flames.
Back Air: Goron Link kicks behind him with both feet.
Up A: Goron Link will curl up into a ball and jump.
Up Tilt: Goron Link swings an open palm over his head.
Up Air: Goron Link headbutts above him.
Down A: Goron Link brings his two fists above him then brings then down on both sides of him.
Down Tilt/Crouch Attack: Goron Link kicks forward.
Down Air: Goron Link drops down really fast.
Dash Attack: Goron Link rolls into a ball covered in flames still moving forward.
Ground Attack: Goron Link quickly rolls around in a circle and gets up.
Ledge Attack Under 100%: Goron Link pulls himself up using the momentum to ram his body in the space in front of the ledge.
Ledge Attack Over 100%: Goron Link pulls himself halfway up, punches then pulls himself all the way up.
Stage Entry: Goron Link rolls in.
Victory Pose #1: Goron Link does the Darunia Dance.
Victory Pose #2: Goron Link takes off his mask turning into Young Link. He then holds his Goron mask by his face.
Up Taunt: Goron Link does the Darunia Dance (I am coping from above because of its classiness).
Side Taunt: Goron Link will roll into a ball and rock back and forth.
Down Taunt: Goron Link plays Saria’s Song on his Drums of Sleep.
--------------------------------------------------------
Fierce Deity Link is a heavyweight character who does not slide at all. He can wall cling but cannot crawl. Fierce Deity Link is taller than Link (not to be confused with Young Link). Fierce Deity Link uses the Double Helix Sword. Because the Double Helix Sword is a two-handed weapon, he cannot wield a shield. However all damage dealt him is halved and all knockback is negated.
Neutral B: Hero’s Bow
Fierce Deity Link fires an ice arrow from his bow. Any opponent near the flight of the arrow or impact will be frozen. This move can be charged but the charge cannot be carried. The arrow does good damage and great knockback.
Side B: Sword Beam
Fierce Deity Link stabs the space in front of him and channels his magical energy into his double helix sword sending out a continuous beam of energy. This attack can be tilted and explodes on impact dealing great damage and great knockback.
Up B: Spin Attack
On the ground, Fierce Deity charges his sword, then spins around dealing great damage and amazing knockback. This attack also sends a fire wave from Fierce Deity Link. This attack can be charged but the charge cannot be carried. In the air, Fierce Deity Link spins upward and lifted up. The last hit is the most powerful dealing great damage and amazing knockback.
Down B: Powder Keg
Fierce Deity Link pulls out a small Powder Keg. It can be thrown in any direction and explodes on impact dealing great damage and amazing knockback.
Tilted Down B: Bombchu
Fierce Deity Link pulls out a Bombchu. It can be thrown in any direction and explodes on impact. If it hits the ground it will travel around the stage like a Hothead until it hits something or until the Final Smash runs out.
Grab: Fierce Deity Link uses his Hookshot as a grab then retracts it quickly.
Grab Air/Z-air: Fierce Deity Link fires his Hookshot then retracts it quickly. This attack can be used to attach to the side of the stage as well as deal good damage and knock back.
Pummel: Fierce Deity Link knees the opponent in the gut.
Forward Throw: Fierce Deity Link kicks the opponent forward.
Back Throw: Fierce Deity Link spins and kicks the opponent.
Up Throw: Fierce Deity Link throws the opponent up and slashes him.
Down Throw: Fierce Deity Link throws opponent on the ground and uses his Sword Beam.
Jab: Fierce Deity Link slashes his sword and then slashes his sword again. Finally he jabs his sword out.
Neutral Air: Fierce Deity Link holds a kick.
Side A: Fierce Deity Link swings his sword from up to down. If A is pressed again, then he swings back up.
Side Tilt: Fierce Deity Link spin kicks.
Forward Air: Fierce Deity Link slashes with his sword back then forth.
Back Air: Fierce Deity Link swings his sword below him and to behind him in one motion.
Up A: Fierce Deity Link strongly slashes above him.
Up Tilt: Fierce Deity Link swings his sword above him.
Up Air: Fierce Deity Link stabs his sword up and keeps it there.
Down A: Fierce Deity Link slashes the space in front of him and behind him in two motions.
Down Tilt/Crouch Attack: Fierce Deity Link sweeps his sword under the opponent’s feet. This can spike if the opponent is on the ledge.
Down Air: Fierce Deity Link stabs the space below him leaving his sword out and allowing gravity to bring speed to his blade.
Dash Attack: Fierce Deity Link slashes the space in front of him.
Ground Attack: Fierce Deity Link stands up and releases a wave of energy.
Ledge Attack Under 100%: Fierce Deity Link jumps up flips and strikes with sword.
Ledge Attack Over 100%: Fierce Deity Link pulls himself up and stabs.
Victory Pose #1: Fierce Deity Link points his sword at the screen with energy coming off his blade.
Victory Pose #2: Fierce Deity Link takes off his mask and Young Link is standing there holding the Fierce Deity Mask by his face.
Up Taunt: Fierce Deity Link points his blade upwards and fires a small Sword Beam that actually does damage.
Side Taunt: Fierce Deity Link pulls out Majora’s Mask looks at it and puts it back.
Down Taunt: Fierce Deity Link holds his blade with two hands and rams it into the ground with power coming of the blade and electricity coming out the whole in the ground.
--------------------------------------------------------
--------------------------------------------------------
Toon Zelda Moveset
Phantom Zelda Moveset
--------------------------------------------------------
Toon Zelda Moveset
Originally posted by Mr. MR
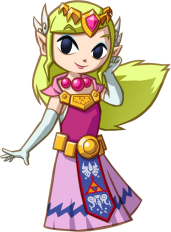
Zelda is a lightweight character who slides a tad. She also possesses good grab range.
Neutral B: Nayru's Love
Toon Zelda spins around in something that looks like blue rupee that splits into tiny blue crystals that spin around her. Almost exactly like Zelda’s Neutral B except Toon Zelda’s Neutral B does one wave of tiny blue crystals, has a smaller hit-box, and ends faster. Like Zelda’s Neutral B, it can reflect projectiles. This has greater knockback and deals more damage then Zelda’s Neutral B.
Side B: Din's Fire
Toon Zelda sends a speeding ball of red flame at the opponent. Toon Zelda’s Side B it explodes when released and has a smaller hit-box than Zelda’s. However Toon Zelda’s Side B has slightly greater range, knockback, and damage than her counterpart. Doing it in the air will boost Toon Zelda forward slightly but exhausts her.
Up B: Farore's Wind
Toon Zelda disappears and reappears in a flash of magic. This is exactly the same as Zelda’s except Toon Zelda’s Up B has greater ledge grab range and smaller hit boxes. When Toon Zelda disappears you can hit any direction and she will reappear there. This attack exhausts Toon Zelda. The disappearing has no hit-box but the reappearing has good damage and knockback.
Down B: Transform
Toon Zelda transforms into Phantom Zelda. Toon Zelda disappears behind a magical light. When the light dissipates Phantom Zelda is there.
Final Smash: Arrow of Light
Just like Zelda and Sheik’s Final Smash, Toon Zelda pulls out a golden bow and fires a Light Arrow. Anyone caught in the arrows line is zoomed in on. After the camera zooms out, every one hit is sent flying back with extreme damage and knockback.
Hold: Toon Zelda holds the opponent telekinetically.
Pummel: Toon Zelda fires a small burst of fire magic at the opponent.
Forward Throw: Toon Zelda fires a fireball at the opponent sending him flying forward.
Back Throw: Toon Zelda spins the opponent above her and shocks the opponent with magic when the opponent is behind her sending him backwards at an angle.
Up Throw: Toon Zelda holds the opponent above her and fires a small blue magical crystal at the opponent sending him skyward.
Down Throw: Toon Zelda throws the enemy on the ground still telekinetically holding them. While doing this she hovers above him and fire a fireball at them while they are on the ground.
Jab: Toon Zelda burns the enemy with her hand.
Neutral Air: 5 small blue crystals spin around Toon Zelda at a slight angle.
Side A: Toon Zelda extends both her hands in front of her, sending a stream of magical blasts. The last magical blast, knock the opponent forward.
Side Tilt: Toon Zelda steps forward and slashes her hand. Following her hand is a trail of fire.
Forward Air: Toon Zelda kicks her foot out. If it lands right, small electrical sparks come out of the foot, which increases the knock back by a lot. Better chance to get the special knock back than Zelda’s Forward Air but it has a smaller hit-box and not as great knock back.
Back Air: Toon Zelda kicks her foot out behind her. If it lands right, small electrical sparks come out of the foot, which increases the knock back by a lot. Better chance to get the special knock back than Zelda’s Forward Air but it has a smaller hit-box and not as great knock back.
Up A: Toon Zelda waves her hand in a circle above her head, sending a stream of magical blasts. The last magical blast, knocks the opponent up.
Up Tilt: Toon Zelda and slashes her hand above her. Following her hand is a trail of fire.
Up Air: Toon Zelda raises her hands up, which creates a huge explosion and sends Toon Zelda downwards.
Down A: Toon Zelda spins her foot around sending sparks in her trail.
Down Tilt/Crouch Attack: Toon Zelda points both hands at a downward angle and creates a huge explosion.
Down Air: Toon Zelda points her hands downward and sends a small spark of magic. If the opponent get hit by this they are sent downwards at a fast speed.
Dash Attack: Toon Zelda puts both hands in front of her and sends fire all around her.
Ground Attack: Toon Zelda spins her legs around trailing magical sparks.
Ledge Attack: Toon Zelda pulls herself up and sets of a mini explosion.
Stage Entry: Toon Zelda comes out of a Nayru's Love
Victory Pose #1: Toon Zelda raises one hand up in victory.
Victory Pose #2: Toon Zelda preforms Farore's Wind and disappears.
Up Taunt: Toon Zelda raises both hands and creates a blue crystal in her hands.
Side Taunt: Toon Zelda puts her hands together and creates a small ball of flames.
Down Taunt: A puff of smoke covers Toon Zelda. When it disappears (which is quickly) Tetra is standing there. The puff of smoke happens again and Toon Zelda is back to normal.
--------------------------------------------------------
Originally posted by Mr. MR
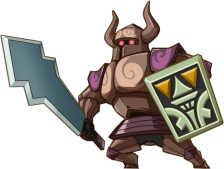
Phantom Zelda is a heavyweight character who does not slide. She does carry a shield that protects her from projectiles much like Link and Toon Link’s shield.
Neutral B: Wrecker
Based off the Wrecker Phantom, Phantom Zelda curls into a ball and transforms into a boulder. If done in the air she comes down like a rock. If done on the ground she can move around and knock your opponents. You can be grabbed and hit (if it has the right amount of knock back) out of it. Let go of B to transform back. Wrecker becomes slower the longer you stay in it. Decent speed, good damage, and good knockback.
Side B: Torch
Based off the Torch Phantom, Phantom Zelda’s sword becomes covered in fire. Then she swings the sword. This attack can be charged but the charge cannot be carried. If it is overcharged the attack will do a fair amount of recoil damage. Good damage and knockback when not charged. Extreme damage and knockback when fully charged.
Up B: Warp
Based of the Warp Phantom, Phantom Zelda disappears and reappears in a puff of smoke. She then reappears in another puff of smoke. Depending on which direction you pressed, depends where she reappears. Deals damage on reappearance and not disappearance. This attack exhausts Phantom Zelda. Good damage and knockback.
Down B: Transform
Phantom Zelda transforms into Toon Zelda. Phantom Zelda disappears behind a magical light. When the light dissipates Toon Zelda is there.
Final Smash: Arrow of Light
Just like Zelda and Sheik’s Final Smash, Phantom Zelda pulls out a golden bow and fires a Light Arrow. Anyone caught in the arrows line is zoomed in on. After the camera zooms out, every one hit is sent flying back with extreme damage and knockback.
Pummel: Phantom Zelda hits the opponent with her shield.
Forward Throw: Phantom Zelda chucks the opponent forward.
Back Throw: Phantom Zelda throws the opponent backwards then hits them with her sword.
Up Throw: Phantom Zelda throws the opponent up then jumps up head butting him.
Down Throw: Phantom Zelda throws the enemy on the ground and body slams the opponent.
Jab: Phantom Zelda swings her sword sideways, then diagonal, and then rams the opponent with her shield.
Neutral Air: Phantom Zelda spins around with her sword.
Side A: Phantom Zelda lunges forward into a side tackle.
Side Tilt: Phantom Zelda steps forward and slashes downward with her sword.
Forward Air: Phantom Zelda brings her sword up then slices downward.
Back Air: Phantom Zelda turns quickly and slashes her sword.
Up A: Phantom Zelda jumps up and head butts the opponent.
Up Tilt: Phantom Zelda steps forward and slashes above her in an arc with her sword.
Up Air: Phantom Zelda rams her shield into the air above.
Down A: Phantom Zelda spins around with her sword.
Down Tilt/Crouch Attack: Phantom Zelda kneels down and slashes with her sword at foot level.
Down Air: Phantom Zelda sweeps her shield below her (Spike).
Dash Attack: Phantom Zelda runs with her shield in front of her landing on her shield.
Ground Attack: Phantom Zelda hits the ground with her shield creating a shock wave and pushing her up.
Ledge Attack: Phantom Zelda pulls herself up strikes with her sword.
Stage Entry: Enters with transformation light. Dissipates faster than normal revealing Phantom Zelda.
Victory Pose #1: Phantom Zelda ignites her sword and holds it in front of her.
Victory Pose #2: A spider comes crawling down a web frightening Phantom Zelda. Phantom Zelda falls backwards and stars start to circle her head.
Up Taunt: Ghost Zelda comes out of the armor leaving the armor bent over. She then reenters and becomes Phantom Zelda again.
Side Taunt: Phantom Zelda lights her blade on fire and waves it around.
Down Taunt: A mouse stars scurrying around her. She starts quivering and avoiding the mouse.
Originally posted by Neosquid
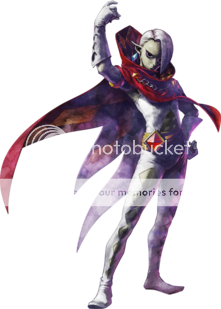
B Move: Dagger Shot
Ghirahim starts levitating a dagger in front of him. Tapping B will cause him to throw just one (the dagger moves horizontally and is not affected by gravity). But holding down B causes him to gather more daggers, stacking them on top of each other. There can be up to six daggers, and the more there are, the greater vertical area they can hit. One dagger does not do very much damage, but if a lot of them hit something it will really hurt them. Ghirahim can levitate the daggers as long as he wants; this can be useful because they can protect him from projectiles. They do vanish on contact, though.
Side B: Barrier Slasher
Ghirahim moves forward very quickly at fast speed. It's very similar to Ike's side B, only, when this attack hits, Ghirahim will attempt to slash his target many times very quickly. It also breaks any shield on the first hit, hence the name. It also has no charge time, unlike Ike's. But it can cause Ghirahim to go flying off the edge of a stage. Thankfully, pressing B will stop it immediately.
Down B: Diamond Tornado
Ghirahim raises his palm into the air. After a brief moment, a black tornado about his height will erupt from it. It is black with diamond sparkles. Anyone above Ghirahim that is caught in this attack will be stuck in falling mode (the mode most characters go into after using their Up B, aka helpless). Taking your finger off B will quickly cause Ghirahim to cease using the attack so he can attack the helpless victim.
Up B: Demon Jump
Ghirahim leaps into the air. The height is about the same as King Dedede's Up B. Tapping B at any time during this will cause him to teleport in a burst of diamonds. Moving the control stick will decide where he reappears; he reappears after about 2 seconds. Immediately after reappearing he dives downward with his sword pointing where he is moving. He slashes through any characters in his way. Since you have little horizontal control during this decent, you can cancel the attack with B, putting Ghirahim is helpless mode but allowing him to maneuver better.
Just a note: not using the teleport will result in him not being put in helpless mode. The teleport distance is also about the same as Meta Knights.
Warning: Skyward Sword Spoilers!
Final Smash:
--------------------------------------------------------
B Move: Dagger Shot
Ghirahim starts levitating a dagger in front of him. Tapping B will cause him to throw just one (the dagger moves horizontally and is not affected by gravity). But holding down B causes him to gather more daggers, stacking them on top of each other. There can be up to six daggers, and the more there are, the greater vertical area they can hit. One dagger does not do very much damage, but if a lot of them hit something it will really hurt them. Ghirahim can levitate the daggers as long as he wants; this can be useful because they can protect him from projectiles. They do vanish on contact, though.
Side B: Barrier Slasher
Ghirahim moves forward very quickly at fast speed. It's very similar to Ike's side B, only, when this attack hits, Ghirahim will attempt to slash his target many times very quickly. It also breaks any shield on the first hit, hence the name. It also has no charge time, unlike Ike's. But it can cause Ghirahim to go flying off the edge of a stage. Thankfully, pressing B will stop it immediately.
Down B: Diamond Tornado
Ghirahim raises his palm into the air. After a brief moment, a black tornado about his height will erupt from it. It is black with diamond sparkles. Anyone above Ghirahim that is caught in this attack will be stuck in falling mode (the mode most characters go into after using their Up B, aka helpless). Taking your finger off B will quickly cause Ghirahim to cease using the attack so he can attack the helpless victim.
Up B: Demon Jump
Ghirahim leaps into the air. The height is about the same as King Dedede's Up B. Tapping B at any time during this will cause him to teleport in a burst of diamonds. Moving the control stick will decide where he reappears; he reappears after about 2 seconds. Immediately after reappearing he dives downward with his sword pointing where he is moving. He slashes through any characters in his way. Since you have little horizontal control during this decent, you can cancel the attack with B, putting Ghirahim is helpless mode but allowing him to maneuver better.
Just a note: not using the teleport will result in him not being put in helpless mode. The teleport distance is also about the same as Meta Knights.
Warning: Skyward Sword Spoilers!
Final Smash:
The Imprisoned
Ghirahim does a weird dance, and summons the Imprisoned from the ground in the center of the stage. The Imprisoned stomps around and can even levitate. It is completely immune to all attacks, and touching it will deal damage to anyone that's not Ghirahim. One of Ghirahim's taunts is a weird dance; using it will cause the Imprisoned to go to his current location. The Imprisoned disappears after about the same time as the Landmaster.
Ghirahim does a weird dance, and summons the Imprisoned from the ground in the center of the stage. The Imprisoned stomps around and can even levitate. It is completely immune to all attacks, and touching it will deal damage to anyone that's not Ghirahim. One of Ghirahim's taunts is a weird dance; using it will cause the Imprisoned to go to his current location. The Imprisoned disappears after about the same time as the Landmaster.
Pokémon
Raichu Moveset (Mr. MR)
Originally posted by Mr. MR

Faster, stronger, and more powerful, these are the attributes that Raichu possesses when compared to his “younger self” known a Pikachu. So why did Raichu not make the cut. Well he is too awesome. And hence why I am making this moveset. Pichu used electricity it did not have and so did damage to himself, Pikachu had the right amount of electricity, but Raichu is overcharged and so has to discharge.
(of course Pichu is still better)
Raichu is a medium weight electric mouse Pokémon who does not slide, and has the ability to wall cling and crawl. If Raichu does not use an electrical attack for 30 seconds, Raichu Discharges electricity damaging the opponent if he is near. This does not hurt Raichu, and deals good damage and knockback to the opponent.
Neutral B: Zap Cannon
Raichu charges (while charging electricity flows through his body) then lets fly a ball of electricity is a straight line. It takes four seconds to fully charge. If not charged it does nothing. When fully charged it possesses great damage and amazing knockback.
Side B: Thunder Punch
Raichu pull his paw back letting electricity from his body flow to his fist, then lets fly a strong punch of electricity. Drains the opponents shield also (chance to paralyze). Good damage and great knockback.
Up B: Extreme Speed
Even though Raichu cannot learn the move, it is essentially a stronger version of Quick Attack which is why I choose Extreme Speed (also a Japanese 2012 event gives Pikachu Extreme Speed which allows Raichu to have that move too). Similar to Pikachu’s Up B, Raichu’s Up B sends Raichu, after a short delay, in the direction you pressed in a straight line. From here if you pressed a different direction, Raichu will do it again. The difference being is on entry Raichu will discharge electrical energy shocking anyone right next to Raichu. This attack exhausts Raichu and does small damage and no knockback.
Down B: Thunder
Raichu calls to the heavens his name. The heavens reply with a small storm cloud and a bolt of lighting. Translation: Raichu summons a lightning bolt. It is stronger and lasts longer than Pikachu’s. Good damage and great knockback.
Final Smash: Overcharged
Raichu starts charging with electricity jumping off him. Raichu becomes super fast (both in attack speed and movement speed), powerful, and does not exhaust. The more electrical moves you perform the weaker Raichu gets. After 35 seconds Raichu releases the rest of his charge in one move. Damage and knockback from the Discharge varies.
Pummel: Raichu shocks the opponent.
Forward Throw: Raichu throws the opponent forward.
Back Throw: Raichu rolls backwards and throws the opponent.
Up Throw: Raichu holds the opponent and summons a small lighting bolt.
Down Throw: Raichu body slams the opponent.
Jab: Raichu headbutts.
Neutral Air: Raichu (surrounded by electricity) flips around in the air.
Side A: Raichu fires a shock similar to Pikachu’s Side A except Raichu has more range.
Side Tilt: Raichu swing his tail.
Forward Air: Raichu spins around (facing forward) covered in electricity.
Back Air: Raichu kicks backwards with his hind legs.
Up A: Raichu charges for a half second then lets electrical energy flow into the space above him.
Up Tilt: Raichu will headbutt in the up direction.
Up Air: Raichu spins around (facing up) while covered in electricity.
Down A: Raichu spin on the ground discharging electricity.
Down Tilt/Crouch Attack: Raichu bends down and sweeps his tail under the opponent making them trip.
Down Air: Raichu will push both of his legs down (spike).
Dash Attack: Raichu rolls while discharging electricity.
Ground Attack: Raichu discharges a massive amount of electricity.
Ledge Attack: Raichu pulls himself up quickly, stands on the front legs, and kicks with his hind legs.
Stage Entry: Comes out of a Pokéball.
Victory Pose #1: Raichu will Extreme Speed around.
Victory Pose #2: Raichu summons five bolts of lighting surrounding him.
Up Taunt: Raichu charges and electricity comes off him in bolts.
Side Taunt: Raichu will put on Lt. Surge’s glasses and crosses his arms.
Down Taunt: Raichu curls up into a ball and rolls back and forth.
Yellow: Normal Raichu.
Blue: Raichu is wearing blue goggles.
Red: Raichu is wearing a red bandanna on his head.
Green: Raichu is wearing a green party hat.
Orange: Shiny Raichu
--------------------------------------------------------
Originally posted by The Storm
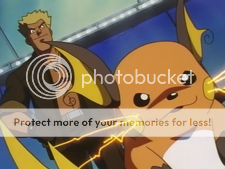
Neutral B: "Raichu, Show 'em a REAL Thundabolt. Shut it DOWN!"
Raichu's signature move, Raichu absorbs electricity yelling, "Raiiiii," for 4 seconds, then unleashes it in a startling blast of electricity while screaming, "CHU!". While charging, Raichu loses all motor functions. This move can be cancelled by pressing the Guard button. Can only be used when charged the full length of time, then a bolt of lightning flashes at lightning speed at any given direction, via the control stick. The lightning blast goes through everything, and can hit multiple enemies if in the same direction. The bolt deals 50% damage plus massive knockback to whomever is hit. Raichu also takes 10% damage.
Side B: Volt Tackle
Raichu charges energy, then rolls forward with an electric spin, almost the same motion and speed as Sonics Side B. Can be cancelled by pressing any button. If Volt Tackle hits at minimal charge, it deals 10% damage to those hit and good knockback, Raichu also takes 3% damage. If hit at max charge time, maximum charge of 3 seconds, Raichu moves much faster and deals 24% damage, great knockback, and Raichu takes 8% damage himself.
Down B: Thunderstorm
Raichu plants his feet on the ground, and charges his power. While doing this, every .8 seconds, a small lightning bolt will shoot from Raichu in a random direction, usually towards his enemies. If they strike an enemy, they take 7% damage and cause knockback. If they hit, Raichu ceases charging. Also, Raichu can be knocked out of charging by any move. While Raichu is charging, every 2 seconds he heals himself by 5%. This move can only be used to heal a maximum of 20% damage per life. When the max healing is reached, Raichu still sputters electricity until the move is cancelled or he is hit.
Up B: Raichu's arrogance, aka Take Down
Raichu dashes in the given direction via control stick. Raichu travels as far as one of Pikachu's Quick Attacks. If Raichu hits an opponent, they are spiked downwards. Raichu deals 10% damage, and takes 3% damage as a result. Also, if it hits, Raichu then enters "free-fall mode".
Final Smash: "Raichu is da Ultimate Pokamon!"
Raichu gains tremendous power. For 8 seconds, Raichu remains vulnerable, but takes no recoil damage from his attacks. Also, all Raichu's moves no longer have to charge.
--------------------------------------------------------
Originally posted by The Storm
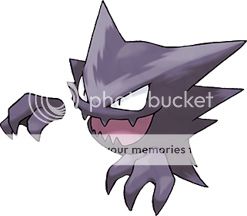
Neutral B: Hypnosis
Haunter shoots six rings in front of him in rapid succession, one after the after. They travel slowly, about the length of Pikachu's Thundershock. If three of the six rings hit the foe, they are put to sleep for 1.5 seconds. if all six hit, the foe is put to sleep for 3 full seconds. Has a .5 second charge time, does no damage, .5 second cooldown.
Side B: Sucker Punch
Haunter shoots his fist forward like a rocket. It goes the distance of Link's boomerang, then disappears. A new hand immediately forms on Haunter. If the Hand hits anything while being shot, it deals 7% damage, no knockback, and 1 full second stun.
Down B: Curse
A needle appears in front of Haunter, and stabs him. Haunter takes 55% damage from this. Then, a small ghost floats around the foe(s), inflicting 10% damage per second for 10 seconds. The only way to alleviate the Curse is by being killed or by waiting the full ten seconds. In addition, all Haunter's moves have their knockback power reduced to very low. It has a 4 second charge time. Haunter takes 12% damage per second that he charges it. If Haunter is hit, or the charge is released before the full 5 seconds passes, Curse does nothing, but Haunter still retains the damage.
Up B: Shadow Sneak
Haunter disappears and dashes in the chosen direction (via control pad/stick) then reappears at the other side. Travels the distance of Zelda's teleport, Fareores Wind. If an enemy(s) are in Hauters way during this move, the disappear as well, traveling with Haunter to the chosen direction. For every second they are invisible with Haunter, they take 3% damage. Haunter travels for 2 seconds full. Both Haunter and whomever he Snuck are invincible and cannot attack for one second after they all reappear.
Final Smash: Night Shade of Terror
Haunter disappears, then dark winds blow the characters back and forth. They layer, and each layer goes the opposite direction the one below it was going. (Figure 1-3 for reference) Then, Haunter reappears, filling up nearly the entire screen with his gas-like body. He laughs heartily, and the wind speed increases, making it more difficult to stay on any platform. The wind does damage depending on Haunter's damage %. If Haunter's damage is 30% or less, the wind does 3% damage per second for 10 seconds. If his damage is between 31-70%, it deals 7% damage per second for 10 seconds. If his damage percent is 71% or higher, it deals 10% damage for every second for 10 seconds. Haunter only fills the screen for the last 4 seconds. The winds, in addition to dealing damage, can push the players off the screen. Their power is slightly less then Squirtles Water Gun fully charged.
I know you guys probably expected Shadow Ball in there somewhere, i felt we already had too much of that with the other players. Plus, Mewtwo's move in Melee was Shadow Ball.
--------------------------------------------------------
Originally posted by Mr. MR
(Note: the original post has more pictures)

From the word doppelgänger comes this Pokémon's name; the Shadow Pokémon Gengar. Some speculate that this Ghost/Poison Pokémon is the shadow of a Clefable, the Fairy Pokémon. The most famous features of Gengar is his sinister grin and his glowing red eyes.
In the Super Smash Bros. Melee, Mewtwo represented Pokémon's villain, just as Ganon and Bowser represented the villain in Legend of Zelda and Super Mario Bros. respectively. However, with the disappearance of Mewtwo from Brawl, the void has been left in the Pokémon villain spot. Gengar is here to fill that void.
Gengar is a medium weight character with the ability to wall cling. He is slow moving on the ground, however, his movement speed becomes fast in the air. He is about the same size as Wario but Gengar is a little bit taller. Gengar cannot crawl but one of his moves allows him to do it in a special way. When passing through a passable platform Gengar will turn transparent and just fall through.
Neutral B: Shadow Ball
Gengar holds his hands in front of him and an orb of shadow starts growing. When fired, Gengar moves his arms to each respective side. The shadow ball itself is a powerful move dealing great knockback and good damage when fully charged. It travels in a straight line until it dissipates. Gengar can hold the charge making him able to surprise his opponents. When Gengar dies he loses any charge he had. Also, when Gengar's Shadow Ball is fully charged Gengar will start to emit a black shadowy aura notifying the player and the opponent that his move is fully charged.
Side B: Shadow Claw
Gengar pulls his hand back and slashes in front of him with shadowy claws. Shadow Claw can weaken shields much better than normal attacks giving it a shield break quality. Knockback on a non-shielded opponent is able to kill at high percents. Shadow Claw's damage is also good. Using it in air does not slow forward momentum but it does slow backwards momentum.
Up B: Levitate
Similar to R.O.B.'s Robo Burner and based off of Gengar's in game Pokémon ability, Gengar's Levitate will propel Gengar through the air for a short amount of time. Using it does not exhaust Gengar making it possible to use a Levitate before and after an attack, however he does have a limited amount of flight time before he touches the ground. When used Gengar turns into a shadowy blob having similar appearance to a Ghost Pokémon before obtaining the Silph Scope in Pokémon generation one. When he attacks, grabs a ledge, is attacked, or if Levitate is interrupted, Gengar will instantly revert back to his usual appearance.
Down B: Shadow Sneak
Gengar melds into the ground or wall, leaving a puddle of darkness complete with black shadows crawling off it (like some shadowy aura), two sinister red eyes, and his trademark smile. Shadow Sneak only works for three seconds, cannot work in the air unless he is next to a wall, and must recharge for five seconds after each use. When using Shadow Sneak, Gengar moves a lot faster; barely surpassing Sonic's speed. Gengar can be knocked out of Shadow Sneak if he is attack, however due to the lack of size in this form, some attacks like Falco's Laser cannot hit Gengar. Shadow Sneak gives Gengar the mobility of a Hothead (Brawl Item); being able to go from the top of the stage to the bottom of the stage by traveling along the ground and walls. Gengar can attack out of this form. When in this form, Gengar can jump right out of the shadow by pressing the jump button. This can be followed up by any aerial move or special. Hitting an attack button when using Shadow Sneak will make Gengar jump out and with a shadowy mini blast that has decent range and knockback, however you cannot use one of your attacks directly after it leaving you vulnerable for a second.
Final Smash: Shadow Force
Even though the move Shadow Force is reserved for Giratina, I thought it would be an appropriate Final Smash for the Shadow Pokémon. When used the screen will darken and Gengar will disappear into the darkness. Gengar will then appears right next to the closest opponent and attacks him with a shadow explosion. If any other opponents are near the explosion they will be hit also. Shadow Force deals both extreme damage and knockback.
Running: Gengar hovers above the ground with his head leaning forward.
Crouching: Gengar half way melds into the floor leaving his body in a shadowy puddle and his head right above the ground.
Wall Clinging: Gengar half way melds into the floor leaving his body in a shadowy puddle and his head sticking out of the wall.
Grabbing: Gengar holds them in the air with telekinesis.
Pummel: Gengar sends a shadowy wave through the opponent.
Forward Throw: Gengar claps his hands sending the opponent flying forwards.
Back Throw: Gengar moves the opponent through his body and sends the opponent flying backwards. The opponent takes shadowy damage when passing through Gengar.
Up Throw: Gengar sends them flying upwards with a shadowy force.
Down Throw: Gengar turns transparent and falls through the floor knocking the opponent against the ground sending the opponent skyward.
Jab: Gengar thrusts out a shadowy hand.
Neutral Air: Gengar spins around creating dark purple flames around him.
Side A: Gengar rams his head into the opponent.
Side Tilt: Gengar licks in the direction you pressed. This has a long startup lag but if it hits the opponent will be temporarily paralyzed.
Forward Air: Gengar throws a shadow punch.
Back Air: Gengar kicks his feet back.
Up A: Gengar headbutts the space above him.
Up Tilt: Gengar will clap his hands above him creating a small dark explosion.
Up Air: Gengar juts his hands up in the air.
Down A: Gengar quickly slashes in front of him then behind him.
Down Tilt/Crouch Attack: Gengar grabs the feet of the opponent. This will cause always cause a trip if the opponent is on the ground. If the opponent is in the air then this attack will send the opponent down.
Down Air: Gengar kicks the space below him. This move will spike.
Dash Attack: Gengar headbutts the opponent.
Ground Attack: Gengar melds into the floor and jumps back out creating a small shock wave.
Ledge Attack #1: Gengar will go right through the corner of the stage and slap the opponent.
Ledge Attack #2: Gengar will float onto the stage and slap the opponent.
Dodge: Gengar turns partially invisible. Anything and everything except for the stage passes right through him. This lasts longer than most dodges.
Side Dodge: Gengar floats backwards and becomes partially invisible. Just like above, anything and everything except for the stage passes right through him. This lasts longer than most dodges.
Stage Entry: Starting invisible, Gengar flashes in and out of visibility until visibility slowly crawls its way up from his feet to his head. When this is happening Gengar is staring at the screen with his usual grin on his face.
Victory Pose #1: Gengar will grin menacingly at the screen and disappear with his smile disappearing last.
Victory Pose #2: Gengar will use hypnosis and all the other characters will fall asleep. Gengar will be awake silently laughing.
Up Taunt: Gengar will put on a very evil smile and his shoulders will move up and down like he is laughing but no sound will be made.
Side Taunt: Gengar will shimmer in and out of visibility never at one point becoming fully invisible.
Down Taunt: Gengar will become a blob of shadow and fall into the ground and pop back up in purple fire.
--------------------------------------------------------
(Note: the original post has more pictures)
From the word doppelgänger comes this Pokémon's name; the Shadow Pokémon Gengar. Some speculate that this Ghost/Poison Pokémon is the shadow of a Clefable, the Fairy Pokémon. The most famous features of Gengar is his sinister grin and his glowing red eyes.
In the Super Smash Bros. Melee, Mewtwo represented Pokémon's villain, just as Ganon and Bowser represented the villain in Legend of Zelda and Super Mario Bros. respectively. However, with the disappearance of Mewtwo from Brawl, the void has been left in the Pokémon villain spot. Gengar is here to fill that void.
Gengar is a medium weight character with the ability to wall cling. He is slow moving on the ground, however, his movement speed becomes fast in the air. He is about the same size as Wario but Gengar is a little bit taller. Gengar cannot crawl but one of his moves allows him to do it in a special way. When passing through a passable platform Gengar will turn transparent and just fall through.
Neutral B: Shadow Ball
Gengar holds his hands in front of him and an orb of shadow starts growing. When fired, Gengar moves his arms to each respective side. The shadow ball itself is a powerful move dealing great knockback and good damage when fully charged. It travels in a straight line until it dissipates. Gengar can hold the charge making him able to surprise his opponents. When Gengar dies he loses any charge he had. Also, when Gengar's Shadow Ball is fully charged Gengar will start to emit a black shadowy aura notifying the player and the opponent that his move is fully charged.
Side B: Shadow Claw
Gengar pulls his hand back and slashes in front of him with shadowy claws. Shadow Claw can weaken shields much better than normal attacks giving it a shield break quality. Knockback on a non-shielded opponent is able to kill at high percents. Shadow Claw's damage is also good. Using it in air does not slow forward momentum but it does slow backwards momentum.
Up B: Levitate
Similar to R.O.B.'s Robo Burner and based off of Gengar's in game Pokémon ability, Gengar's Levitate will propel Gengar through the air for a short amount of time. Using it does not exhaust Gengar making it possible to use a Levitate before and after an attack, however he does have a limited amount of flight time before he touches the ground. When used Gengar turns into a shadowy blob having similar appearance to a Ghost Pokémon before obtaining the Silph Scope in Pokémon generation one. When he attacks, grabs a ledge, is attacked, or if Levitate is interrupted, Gengar will instantly revert back to his usual appearance.
Down B: Shadow Sneak
Gengar melds into the ground or wall, leaving a puddle of darkness complete with black shadows crawling off it (like some shadowy aura), two sinister red eyes, and his trademark smile. Shadow Sneak only works for three seconds, cannot work in the air unless he is next to a wall, and must recharge for five seconds after each use. When using Shadow Sneak, Gengar moves a lot faster; barely surpassing Sonic's speed. Gengar can be knocked out of Shadow Sneak if he is attack, however due to the lack of size in this form, some attacks like Falco's Laser cannot hit Gengar. Shadow Sneak gives Gengar the mobility of a Hothead (Brawl Item); being able to go from the top of the stage to the bottom of the stage by traveling along the ground and walls. Gengar can attack out of this form. When in this form, Gengar can jump right out of the shadow by pressing the jump button. This can be followed up by any aerial move or special. Hitting an attack button when using Shadow Sneak will make Gengar jump out and with a shadowy mini blast that has decent range and knockback, however you cannot use one of your attacks directly after it leaving you vulnerable for a second.
Final Smash: Shadow Force
Even though the move Shadow Force is reserved for Giratina, I thought it would be an appropriate Final Smash for the Shadow Pokémon. When used the screen will darken and Gengar will disappear into the darkness. Gengar will then appears right next to the closest opponent and attacks him with a shadow explosion. If any other opponents are near the explosion they will be hit also. Shadow Force deals both extreme damage and knockback.
Running: Gengar hovers above the ground with his head leaning forward.
Crouching: Gengar half way melds into the floor leaving his body in a shadowy puddle and his head right above the ground.
Wall Clinging: Gengar half way melds into the floor leaving his body in a shadowy puddle and his head sticking out of the wall.
Grabbing: Gengar holds them in the air with telekinesis.
Pummel: Gengar sends a shadowy wave through the opponent.
Forward Throw: Gengar claps his hands sending the opponent flying forwards.
Back Throw: Gengar moves the opponent through his body and sends the opponent flying backwards. The opponent takes shadowy damage when passing through Gengar.
Up Throw: Gengar sends them flying upwards with a shadowy force.
Down Throw: Gengar turns transparent and falls through the floor knocking the opponent against the ground sending the opponent skyward.
Jab: Gengar thrusts out a shadowy hand.
Neutral Air: Gengar spins around creating dark purple flames around him.
Side A: Gengar rams his head into the opponent.
Side Tilt: Gengar licks in the direction you pressed. This has a long startup lag but if it hits the opponent will be temporarily paralyzed.
Forward Air: Gengar throws a shadow punch.
Back Air: Gengar kicks his feet back.
Up A: Gengar headbutts the space above him.
Up Tilt: Gengar will clap his hands above him creating a small dark explosion.
Up Air: Gengar juts his hands up in the air.
Down A: Gengar quickly slashes in front of him then behind him.
Down Tilt/Crouch Attack: Gengar grabs the feet of the opponent. This will cause always cause a trip if the opponent is on the ground. If the opponent is in the air then this attack will send the opponent down.
Down Air: Gengar kicks the space below him. This move will spike.
Dash Attack: Gengar headbutts the opponent.
Ground Attack: Gengar melds into the floor and jumps back out creating a small shock wave.
Ledge Attack #1: Gengar will go right through the corner of the stage and slap the opponent.
Ledge Attack #2: Gengar will float onto the stage and slap the opponent.
Dodge: Gengar turns partially invisible. Anything and everything except for the stage passes right through him. This lasts longer than most dodges.
Side Dodge: Gengar floats backwards and becomes partially invisible. Just like above, anything and everything except for the stage passes right through him. This lasts longer than most dodges.
Stage Entry: Starting invisible, Gengar flashes in and out of visibility until visibility slowly crawls its way up from his feet to his head. When this is happening Gengar is staring at the screen with his usual grin on his face.
Victory Pose #1: Gengar will grin menacingly at the screen and disappear with his smile disappearing last.
Victory Pose #2: Gengar will use hypnosis and all the other characters will fall asleep. Gengar will be awake silently laughing.
Up Taunt: Gengar will put on a very evil smile and his shoulders will move up and down like he is laughing but no sound will be made.
Side Taunt: Gengar will shimmer in and out of visibility never at one point becoming fully invisible.
Down Taunt: Gengar will become a blob of shadow and fall into the ground and pop back up in purple fire.
--------------------------------------------------------
Originally posted by The Storm

Neutral B: Focus Punch
Hitmonchan charges a powerful punch, then throws it with explosive force. Same speed and range as Falcon Punch. Has a 4 second charge time. Deals 30% damage plus immense knockback. (I felt we needed another Falcon Punch in the game)
Side B: Mach Punch
Hitmonchan dashes forward at a blinding speed, throwing a weak punch at the end. 4% damage, no knockback, .25 second stun, same range as Ike's fully charged Side B.
Down B: Counter
Hitmonchan blocks his face with his gloves, ready to counter any physical attack for 1.3 seconds. He can only counter physical attacks, any projectile or magic based attack goes through.
Up B: Rapid Sky Uppercut
Hitmonchan jumps into the air at a 45 degree angle, travelling a small amount more than Mario's uppercut. While travelling, he punches furiously, letting loose a huge uppercut at the end. Any character caught in this attack deals 1% damage per hit, a total of 12 hits fired, and the uppercut at the end deals 7% damage and decent knockback. He is completely defensless during this attack from the bottom.
Final Smash: The "Chan Man's" Rhapsody
Hitmonchan rushes across the ring, not stopping until he hits a target. (note: if he does not run into anything, he could easily run out of the ring) If Hitmonchan runs into a target, the camera zooms in close, and a fast pace drum solo begins, rapidly beating the Snare drum. As the drum makes a hit, Hitmonchan also swings punches. All in all, it is a rapid punch flurry that goes to the beat of the drum. When the solo ends on a cymbal crash, Hitmonchan also throws his final punch, which is a straight forward "superman" punch. Each punch does 2% damage, with a total of 45 punches thrown in rapid, unblockable succession. The final "superman" punch deals an extra 25% damage, for a total of 115% damage dealt, plus immense knockback. If multiple characters are grouped together, the damage is split equally among them.
For those who dont know what the "superman" punch is, it’s a punch where the attacker rears back, and throws his fist into the opponents chest with their full body weight behind it. It’s a KO punch basically.
So its known i plan on editing in his A moves later, which will include Thunderpunch, Fire Punch, Ice Punch, and Mega Punch.
I think its time for me to make another moveset...hopefully i can measure up to the expectations!
--------------------------------------------------------
Originally posted by The Storm

Stagnant Effect: Magikarp cannot run, he only flops on the stage. He moves as slow as Bowser starting off, and can only jump once, no double jump. Walking/running only makes Magikarp slowly flop across the stage, continuously yelling "Karp Karp Karp Karp!"
Neutral B: "Flail"- Using this move, Magikarp literally flails in place out of control. Hit radius is identical to Ike's fully charged neutral B. deals damage equal to half the total damage Magikarp has taken when the move hits. Deals knock back that doubles in strength for every 10 points of damage dealt by this attack, maxing out at 5 times normal knockback (e.g, if this move is used while Magikarp is at 100 damage, it deals 50 damage and immense knockback.)
Side B: Tackle
this move is chargeable. It takes 1.3 seconds to fully charge, when released, Magikarp flies across the screen the speed and distance of Fox's Side B. Deals 15% damage on impact, however deals no knockback damage whatsoever, does not make the for flinch (like Fox's laser) If the move is not fully charged when used, this attack does absolutely nothing.
Down B: Swift Swim
Magikarp glows blue and doubles its speed movement. Can be stacked up to 5 times. When maxed out, makes Magikarp move at the same speed Sonic runs, and lets Magikarp jump twice as high. If Magikarp loses a life, the stack is reset. Takes 1.3 seconds to charge up in order to activate effect. If not fully charged or if Magikarp is hit (even by a non flinching move like Fox's laser) then Magikarp stops charging and no speed boost is applied.
Up B: Bounce
Kind of like a reverse movement of Dee De Dee, where DDD shoots up, then descends quickly, Magikarp slams down to the ground, then bounces off it and springs high into the air, the equivalent height of a double jump by Luigi. Deals 6% damage on impact of the ground, as long as Magikarp is in the air, he can continuously bounce. Note that if there is no contact point beneath Magikarp, he will plummet to his death very quickly. If "Bounce" strikes a for in the air, Magikarp bounces off of them and the foe is spiked downwards.
Final Smash: Splash... Or is it?
Magikarp springs into the air and calls its name loudly, causing a wave of hundreds of Magikarp to crash upon the stage in random areas all using the Splash move. Magikarp literally rain down the screen. Damage and knockback-wise, this move does nothing. Nothing happens. HOWEVER!!! Upon using this Final Smash, Magikarp glows white and evolves into Gyarados for 30 seconds. Gyarados can fly and is controlled much like Yoshi. When Magikarp evolves into Gyarados, the entire screen fills with water and all foes swim as though they are underwater. They cannot attack while underwater. Pressing the A button uses Dragon Rage, exhaling red flames an dealing 40% damage, along with good knockback. If the A button is not pressed for more than 3 seconds, whirlpools will randomly spawn throughout the screen. The Whirpools deal no damage, but instead push opponents off screen, causing KO's. after 30 seconds, Magikarp reverts back to its normal form.
--------------------------------------------------------
Originally posted by Tragonight
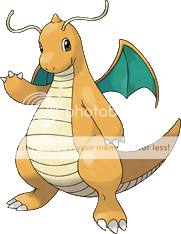
Dragonite is a heavy, moderately fast character, able to glide and perform 5 wing flaps after a jump.
Neutral B: Hyper Beam
Dragonite spits out an enormous white beam, with as much range but more power and knockback than R.O.B's lazer. It is also slightly larger. This move is extremely powerful, and Dragonite has to wait 45 seconds before it can be used again. It cannot be used in the air. If tried before the recharge is finished, Dragonite will only open his mouth and push himself back a bit.
Side B: Body Slam
Dragonite rushes and slams into the opponent, doing good damage and fair knockback. If it's used on the ground, and it misses, Dragonite's head gets planted into the ground and is vulnerable for half a second. If used in the air, and successful, he will attempt to sit on his opponent, grabbing them and putting them under him. Great damage and good knockback. Then both of them are spiked downwards, making this a horrible (and suicidal) recovery move. If not successful, Dragonite is tired out and falls.
Up B: Thunder
A giant thunderbolt falls under him, propelling him upwards. (In other words he sh*ts out a giant thunderbolt) Good damage, great knockback. It can go through platforms, has the same range as Pikachu's Thunder, and cannot spike downwards. Anyone who is touched by Dragonite is also damaged slightly, until he starts falling.
Down B: Fire Blast
Five fireballs gather around him, and once they all meet an explosion follows. The explosion is the length of 3 Dragonites and the height of 1 and 1/3. The fireballs do no damage, so an enemy can approach while it is being used. This move cannot be charged and takes 2 seconds to fully use. Good damage, fair knockback. If used in the air, an automatic smaller explosion happens, only the size of 1 Dragonite. He is then tired out and falls.
Final Smash: Draco Meteor
Dragonite flies to the top-center of the screen and starts unleashing multiple comets in rapid succession. Able to break enemy shields.
They can only fire in one direction, and can be aimed left or right. Great damage and great knockback.
Neutral A/Jab: Dragonite slashes twice, and the third time he spins around quickly and smacks the opponent with his tail. Third A is risky of tripping.
Side A: Dragonite punches straight out in front of him.
Up A: He thrusts his head upwards, hitting anyone on top of or directly next to him.
Down A: Claws at the ground once.
Dash Attack: Headbutts the opponent.
Side Smash: Throws his head down in the direction it is used. Similar but less range than Bowser's Smash. Good damage and little knockback.
Up Smash: His head glows pink and is thrust upwards at an opponent. (Zen Headbutt) Great damage and good knockback.
Down Smash: Stomps on the ground once furiously, damaging anyone to either side of Dragonite. Great damage and fair knockback.
Neutral Aerial: Spins around in a circular motion. Anyone hit by his tail is hurt.
Forward Aerial: Does a forward slash, arching downwards. Does not spike.
Back Aerial: Flaps his wings in the opponent's face.
Up Aerial: Slashes upwards, although not directly upwards. Depends on the direction he is facing when used.
Down Aerial: Kicks under him, meteor smashing anyone who is hit. Hard to aim as it has little range. (Does fewer damage than Ganondorf's)
Grab Attack: Butts head into the opponent.
Forward Throw: Smashes head straight into opponent, like a bull. Fair damage and fair knockback.
Back Throw: Chokes opponent and kicks at them backwards. Good damage and fair knockback.
Up Throw: Throws opponent upward and finishes with a slap of his tail. Fair damage and good knockback.
Down Throw: Sits on opponent. Good damage and good knockback.
Ledge Attack: Rams into opponent once half of his body is up.
Stage Entry: Flies down to the stage from above the screen.
Up Taunt: Roars loudly and angrily for a good amount of time.
Down Taunt: Falls asleep while standing up, and then awakens, startled.
Side Taunt: Dragonite starts jumping and dancing about.
Victory Pose 1: Roars and shows his sharp teeth, and then calmly licks his paws.
Victory Pose 2: Gets out a Berry and starts eating it, staining his mouth.
--------------------------------------------------------
Originally posted by Mr. MR
Pichu has returned but not alone. Pichu Bros. may look like an Ice Climbers pair but they play completely different; with the focus off Chain Grabbing and on Switch Combos with their Volt Switch Mechanic.
Volt Switch Mechanic: When both Pichus are Synchronized, and the lead Pichu performs any attack or throw, you will gain full control over the other Pichu. Holding the Attack Button after you perform an Aerial Attack, or a Tilt and charging Smash Attacks will make the other Pichu perform the same attack right after the other one starts (including charging the Smash attack until released). Holding the Special Button after a Special Attack will result in the same thing however by pressing both the Attack Button and the Special Button will cause both Pichu Bros. to perform Special Attacks at the same time (depending on the direction being held determines the Special being used).
Lead Pichu: The Player Controlled Pichu
CPichU: Computer Controlled Pichu, the other Pichu, the Pichu that is not the Lead Pichu
The CPichU is always trying to Synchronize with the Lead Pichu and will use Thunder Jolt towards the closest enemy when in the air as he approaches the Lead Pichu. Otherwise he will not attack unless commanded to.
Pressing any Taunt Button while Synchronized on a ledge will switch the Lead role. If the Lead Pichu dies, the other one becomes the Lead Pichu.
Because Volt Switching is permanent until used again, both the Pichu Bros.' percentage will be shown at the bottom at the same time.
Distinguishing Pichu's are not necessary, but distinguishing the Lead Pichu is. Only the Lead Pichu will have a Player Sign/Name above him.
Because Chain Grabbing is not the focus of Pichu Bros., Chain Grabs they may have are limited and will fail if they go beyond a certain number of consecutive grabs.
Neutral Special: Thunder Jolt
Just like in Melee, a ball of electricity that becomes a jumping line of electricity when it hits the ground.
Because both Pichu Bros. can use it at the exact time and right after each other, it is a very versatile move that can be a very effective Edgeguarding and Spacing Tool. However to discourage camping, both Pichu Bros. will suffer a 2% gain each time they use it; 1% if they are using it Desynchronized.
Side Special: Helping Hand
This move has two functions depending on whether the Pichu Bros. are Synchronized, Desynchronized, or are performing Side Special at the same time.
When Synchronized, the Lead Pichu will throw the CPichU a long distance. The one thrown automatically becomes the Lead Pichu. Attacks done out of the toss increases the damage and the knockback of the attack. This can be used as a recovery method and a finisher.
When Desynchronized, Helping Hand immediately switches control to the other Pichu. This is helpful tool to protect each Pichu when they are under assault as Desynchronization will happen often. Most combos will start with Synchronization and end with Desynchronization, however you can keep the Switch Combos going for a little longer with this Special.
When both Pichu Bros. use Helping Hand at the same time while they are in Synchronization by way of pressing the Attack Button and the Special Button at the same time while holding the Directional Stick to the Side, the CPichU will throw the Lead Pichu. Same as when normally done in Synchronization, attacks done out of the toss increase the damage and the knockback of the attack.
When Desynchronized, the doubling effect will Synchronize both Pichu Bros. immediately if they are in close range, otherwise it does nothing.
Up Special: Agility
Because they rely on each other, their complete Up Special can only be done together. The recovery has 4 parts both in Synchronization and in close range in Desynchronization, unlike Pichu's 2 part recovery in Melee. However the new Agility has not been slowed down.
Alone, each Pichu can only perform one half of Melee Pichu's Agility, however together they have a complete Agility. Ground Canceling Agility works directly on the ground and Agility deals 0% in both parts.
When done in Synchronization, or in very close Desynchronization, the Lead Pichu will perform the first half of Melee Pichu's Agility and takes the same amount of time. In the case of a very close Desynchronization, the CPichU will perform the first part as if he was Synchronized (meaning that the CPichU will appear right next to the Lead Pichu). If the CPichU is attacking when the Lead Pichu uses Agility, the CPichU will not auto Synchronize with the Lead Pichu. The next three parts takes as much time as the second half of Melee Pichu's Agility would take. Next the CPichU will perform a complete Agility with its first half following the same path as the first part and the second half in a new direction. At this point the roles Switch. The former Lead Pichu will follow right behind the new Lead Pichu.
When done in close but not too close Desynchronization, the CPichU will perform half of Melee Pichu's Agility towards the Lead Pichu and the second half in the direction held. Then the Lead Pichu will Agility through his path and then move in the new direction held leaving the CPichU behind.
When Ground Canceled, the CPichU will not follow the Lead Pichu. When used at the same time, they will use Agility as if they were Desynchronized, however this allows them to Ground Cancel Agility together giving them impressive mobility.
Down Special: Thunder
Pichu Bros. Down Special is more like Pikachu's Thunder in Brawl. Opponents will bounce off it like a wall instead of being lifted up through it like it was in Melee. Opponents trapped in a well spaced Double Thunder will bounce in between each one and can be used a finisher (a move I like to call Jacob's Ladder both as a Stairway to Heaven and as a High Voltage Traveling Arc). The knockback from when the Thunder strikes a Pichu is not as powerful as Pikachu's and unlike Pikachu's Thunder, the Pichu Bros. Thunder still deals 3% percent to each when hit by their respective Thunders.
--------------------------------------------------------
Originally posted by Neosquid

Sableye are pranksters, and they eat gems. They're Ghost/Dark type, which means that they're like naughty ghosts. Sableye often use their claws to attack, using moves such as Scratch, Fury Swipes, and Shadow Claw. They live in caves.
Sableye is a lightweight character whose speed is slightly above average.
Neutral B: Fury Swipes
Sableye swipes its claws around 5 times, very quickly. Each individual slash only does a bit of damage, but if they all hit they do a good amount. If used on the ground, anything close to Sableye will be hit, as the swipes are used in an arch motion. If used in the air, Sableye will swipe in front of himself, leaving anything above, below or behind him safe, but at the same time getting more horizontal range.
Side B: Will-o-wisp
Sableye summons a ghostly bluish flame, and sends it towards and opponent. It moves fairly quickly, and can cover a wide range in front of Sableye. When an opponent is hit, they are hurt a little by burn damage, but the main advantage is that they're trapped by the fire for a few seconds. In this time Sableye can run up and attack. This attack makes Sableye lag for about two seconds if it is canceled, though, and Sableye can't move while controlling the flame.
This is the range the fireball can cover:
----xxx
--xxxxxx
Xxxxxxxx
Down B: Power Gem
Sableye charges up while standing in place. The charge cannot be held by moving. If charged for less then two seconds, the attack does nothing. If charged for 2-4 seconds, Sableye shoots out an energy ball that resembles a diamond. When it hits something, it explodes, doing moderate knockback and good damage. If charged for at least 5 seconds, the diamond projectile is bigger, and does more damage and knockback. Not only that, but when it collides, the explosion sends out three smaller energy balls. These small diamonds have homing properties, and do a good amount of damage but no knockback.
Up B: Astonish
Sableye turns into a shadowy figure while jumping. The jump range is about as high as Charizard's Fly. If Sableye makes contact with an opponent during this jump, he reappears, grabs them, and yells into their face while smiling. This startles them, causing them to fall. Sableye, however, remains capable of attacking them. However, if Sableye does not hit anyone, he will enter a falling animation at the end of the move.
Final Smash: Shadow Crystal
For his Final Smash, Sableye jumps in the air, and encases himself in a giant shadow crystal that sprouts from the ground. In this form, he can fire thick lasers of dark energy anywhere on the stage, doing little knockback but lots of damage. The laser recharges after about two seconds. This final smash has no timer; rather, it ends when Sableye's opponents break open the crystal, which can take quite a beating.
Alternate B Attacks
Neutral A: Sableye slashes in from of him. Does little damage and a fair amount of knockback, meaning it's not great for chaining damage.
Side A: Sableye unleashes a longer slash in front of him. Has less vertical range then Neutral a, but more horizontal.
Up A: Sableye levitate himself in the air and quickly turns over to unleash two kicks into the air. Not much range or damage, but a fair amount of knockback.
Down A: Levitates himself inches above the ground and unleashes a kick in front of him.
Dash attack: Sableye uses Low Sweep to use a sliding kick attack. Good range, but little damage and knockback. Has a chance to trip.
Normal Smash: Sableye charges up, and when he's finished, he unleashes a powerful Shadow Claw in front of him. Average damage, but a lot of knockback.
Up Smash: Sableye charges up by focusing physic power into his head, then jumps up and heatbutts the air. This attack is Zen Headbutt. Average damage and lots of knockback.
Down Smash: Sableye charges up, and unleashes a shadowy explosion on the ground, hitting all those close to him. Little knockback but lots of damage.
Neutral Air: Sableye shoots out a small burst of ghostly flame that hits all sides of him. Little damage and knockback.
Forward Air: Sableye bites in front of him. Almost no knockback, but good damage.
Down air: Sableye does a flip in the air and slashs underneath him. Little damage and decent knockback.
Up Air: Sableye levitates himself into the air at high speed head first, has good range and knockback, but little damage. Due to this attack helping to gain vertical area, there's a two second lag time after it's used.
Hold: Sableye uses Telekinesis to hold an opponent in midair. Doesn't last as long as other holds.
Pummel: Scratches the enemy.
Forward Throw: Sableye unleashes a shadowy blast from his eyes right into the opponent, point black, causing a decent amount of damage and a lot of knockback.
Up Throw: Sableye uses Psychic to throw the opponent into the air, causing little damage but a lot of knockback.
Back throw: Sableye quickly teleports to the other side of the opponent and slashes them away. Little damage but lots of knockback.
Down Throw: Sableye jumps over the opponent and unleashes a shadowy burst that knocks them into the ground. Good amount of knockback and high damage.
Ledge attack: Sableye jumps onto the stage and lunges towards the opponent to bite them.
Ground attack: Sableye creates a small explosion of shadows, which he proceeds to use as cover to get up.
Stage entry: A crystal sprouts from the ground, and Sableye breaks out of it. Can be either blue, red, or green.
Victory Pose 1: Sableye laughs at the screen and tosses gems into his mouth, eating them.
Victory Pose 2: Sableye vanishes into the shadows, and reappears in front of one of the losers, startling them badly.
Taunt 1: Sableye grins at the screen while waving his fingers in the air.
Taunt 2: Sableye gets out a gem, and proceeds to lick it with a long tongue.
Taunt 3: Sableye shoots out a Will o wisp, while it proceeds to fly around his body, confusing him.
--------------------------------------------------------
Original Sableye Moveset
--------------------------------------------------------
Sableye are pranksters, and they eat gems. They're Ghost/Dark type, which means that they're like naughty ghosts. Sableye often use their claws to attack, using moves such as Scratch, Fury Swipes, and Shadow Claw. They live in caves.
Sableye is a lightweight character whose speed is slightly above average.
Neutral B: Fury Swipes
Sableye swipes its claws around 5 times, very quickly. Each individual slash only does a bit of damage, but if they all hit they do a good amount. If used on the ground, anything close to Sableye will be hit, as the swipes are used in an arch motion. If used in the air, Sableye will swipe in front of himself, leaving anything above, below or behind him safe, but at the same time getting more horizontal range.
Side B: Will-o-wisp
Sableye summons a ghostly bluish flame, and sends it towards and opponent. It moves fairly quickly, and can cover a wide range in front of Sableye. When an opponent is hit, they are hurt a little by burn damage, but the main advantage is that they're trapped by the fire for a few seconds. In this time Sableye can run up and attack. This attack makes Sableye lag for about two seconds if it is canceled, though, and Sableye can't move while controlling the flame.
This is the range the fireball can cover:
----xxx
--xxxxxx
Xxxxxxxx
Down B: Power Gem
Sableye charges up while standing in place. The charge cannot be held by moving. If charged for less then two seconds, the attack does nothing. If charged for 2-4 seconds, Sableye shoots out an energy ball that resembles a diamond. When it hits something, it explodes, doing moderate knockback and good damage. If charged for at least 5 seconds, the diamond projectile is bigger, and does more damage and knockback. Not only that, but when it collides, the explosion sends out three smaller energy balls. These small diamonds have homing properties, and do a good amount of damage but no knockback.
Up B: Astonish
Sableye turns into a shadowy figure while jumping. The jump range is about as high as Charizard's Fly. If Sableye makes contact with an opponent during this jump, he reappears, grabs them, and yells into their face while smiling. This startles them, causing them to fall. Sableye, however, remains capable of attacking them. However, if Sableye does not hit anyone, he will enter a falling animation at the end of the move.
Final Smash: Shadow Crystal
For his Final Smash, Sableye jumps in the air, and encases himself in a giant shadow crystal that sprouts from the ground. In this form, he can fire thick lasers of dark energy anywhere on the stage, doing little knockback but lots of damage. The laser recharges after about two seconds. This final smash has no timer; rather, it ends when Sableye's opponents break open the crystal, which can take quite a beating.
Alternate B Attacks
Originally posted by Mr. MR
--------------------------------------------------------
Side B: Power Gem
Sableye charges and launches a bunch of gem fragments in the direction pressed. This move can be charged but the charge cannot be carried. If this move is used with no charge, two gems will be launched in front of Sableye in random forward trajectories. When fully charged it sends a wave of gems each one moving in a random forward trajectory. This move deals small amount of damage and knockback for each projectile.
Down B: Will-o-Wisp
Sableye is engulfed in a dark flame. When used on the ground, the flames spread on the ground weakening the farther they travel away from Sableye. Any opponent hit by these flames will receive small fire damage and good knockback.
--------------------------------------------------------
--------------------------------------------------------
Side B: Power Gem
Sableye charges and launches a bunch of gem fragments in the direction pressed. This move can be charged but the charge cannot be carried. If this move is used with no charge, two gems will be launched in front of Sableye in random forward trajectories. When fully charged it sends a wave of gems each one moving in a random forward trajectory. This move deals small amount of damage and knockback for each projectile.
Down B: Will-o-Wisp
Sableye is engulfed in a dark flame. When used on the ground, the flames spread on the ground weakening the farther they travel away from Sableye. Any opponent hit by these flames will receive small fire damage and good knockback.
--------------------------------------------------------
Side A: Sableye unleashes a longer slash in front of him. Has less vertical range then Neutral a, but more horizontal.
Up A: Sableye levitate himself in the air and quickly turns over to unleash two kicks into the air. Not much range or damage, but a fair amount of knockback.
Down A: Levitates himself inches above the ground and unleashes a kick in front of him.
Dash attack: Sableye uses Low Sweep to use a sliding kick attack. Good range, but little damage and knockback. Has a chance to trip.
Normal Smash: Sableye charges up, and when he's finished, he unleashes a powerful Shadow Claw in front of him. Average damage, but a lot of knockback.
Up Smash: Sableye charges up by focusing physic power into his head, then jumps up and heatbutts the air. This attack is Zen Headbutt. Average damage and lots of knockback.
Down Smash: Sableye charges up, and unleashes a shadowy explosion on the ground, hitting all those close to him. Little knockback but lots of damage.
Neutral Air: Sableye shoots out a small burst of ghostly flame that hits all sides of him. Little damage and knockback.
Forward Air: Sableye bites in front of him. Almost no knockback, but good damage.
Down air: Sableye does a flip in the air and slashs underneath him. Little damage and decent knockback.
Up Air: Sableye levitates himself into the air at high speed head first, has good range and knockback, but little damage. Due to this attack helping to gain vertical area, there's a two second lag time after it's used.
Hold: Sableye uses Telekinesis to hold an opponent in midair. Doesn't last as long as other holds.
Pummel: Scratches the enemy.
Forward Throw: Sableye unleashes a shadowy blast from his eyes right into the opponent, point black, causing a decent amount of damage and a lot of knockback.
Up Throw: Sableye uses Psychic to throw the opponent into the air, causing little damage but a lot of knockback.
Back throw: Sableye quickly teleports to the other side of the opponent and slashes them away. Little damage but lots of knockback.
Down Throw: Sableye jumps over the opponent and unleashes a shadowy burst that knocks them into the ground. Good amount of knockback and high damage.
Ledge attack: Sableye jumps onto the stage and lunges towards the opponent to bite them.
Ground attack: Sableye creates a small explosion of shadows, which he proceeds to use as cover to get up.
Stage entry: A crystal sprouts from the ground, and Sableye breaks out of it. Can be either blue, red, or green.
Victory Pose 1: Sableye laughs at the screen and tosses gems into his mouth, eating them.
Victory Pose 2: Sableye vanishes into the shadows, and reappears in front of one of the losers, startling them badly.
Taunt 1: Sableye grins at the screen while waving his fingers in the air.
Taunt 2: Sableye gets out a gem, and proceeds to lick it with a long tongue.
Taunt 3: Sableye shoots out a Will o wisp, while it proceeds to fly around his body, confusing him.
--------------------------------------------------------
Original Sableye Moveset
Originally posted by Neosquid
Neutral B: Shadow Claw
Sableye charges up for a bit more than a second, and releases a claw of shadows that covers the following range. It can be tilted to be aimed upwards, straight, or downwards. Each one has a sweet spot where, if you hit the opponent with it, it will do a lot of knockback. The red is the attack range, and the big X is Sableye.
Up tilt (Top of J is the sweet spot):
XxJ
Down tilt (bottom of q is the sweet spot)
Xxq
No tilt (o is sweet spot):
Xxo
Side B: Will-o-wisp
Sableye summons a ghostly bluish flame, and sends it towards and opponent. It moves fairly quickly, and can cover a wide range in front of Sableye. When an opponent is hit, they are hurt a little by burn damage, but the main advantage is that they're trapped by the fire for a few seconds. In this time Sableye can run up and attack. This attack makes Sableye lag for about two seconds if it is canceled, though, and Sableye can't move while controlling the flame.
This is the range the fireball can cover
----xxx
--xxxxxx
Xxxxxxxx
Down B: Power Gem
Pressing Down B will cause Sableye to crouch on the ground and look at the screen. You can aim the way he looks, and when you line up Sableye's gaze with a target, you can press B again, causing Sableye to shoot a thin beam from its eyes. The beam is in the shape of a crystal. The beam passes through enemies, and does a bit of damage to each one it hits, with no knockback, though it does make them flinch. Sableye, after shooting a beam, needs a little less then a second to recharge before shooting another beam.
The range is very big. Pressing A will cause Sableye to go out of the move.
Up B: Shadow Sneak
Sableye turns into a shadow, and can be controlled in this form for about a second. The shadow defies gravity, and can move in any direction you please. Pressing Up B will cause a burst of acceleration in the direction you tilt as well. This attack does no damage.
Range (same horizontal range as vertical, count the x's):
xxxxxxx
xxxxxxx
xxxxxxx
xxxxxxx
xxxxxxx
xxxxxxx
xxxxxxx
Final Smash: Shadow Crystal
For his Final Smash, Sableye jumps in the air, and encases himself in a giant shadow crystal that sprouts from the ground. In this form, he can fire thick lasers of dark energy anywhere on the stage, doing little knockback but lots of damage. The laser recharges after about two seconds. This final smash has no timer; rather, it ends when Sableye's opponents break open the crystal, which can take quite a beating.
--------------------------------------------------------
Originally posted by Tragonight
(Note: the original post has more pictures)
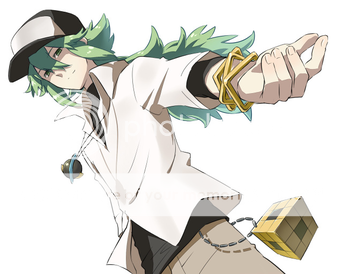
N is a new [strike]antagonist[/strike] protagonist to the Pokemon series, and appears in Generation V. He has a unique ability that allows him to communicate with and understand Pokemon. With this ability, he befriends the legendary Pokemon Zekrom and Reshiram.
N cannot fight. He acts like the Pokemon Trainer in Brawl, and stands on the same platform. His arms are crossed and his head lowered, but he is still aware of what is happening. Unlike Pokemon Trainer, N remains silent throughout the entire brawl, even when switching out. He will be using three Pokemon to fight for him, with a special one for his Final Smash. The three Pokemon are as follows: Zorua , Zoroark , Klinklang.
Zorua Moveset
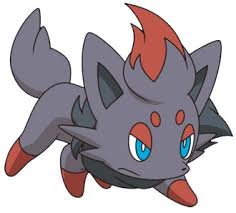
Zorua is a lightweight, fast character.
Neutral B: Roar
Zorua moves his head back and roars. This move can be charged at a maximum of 4 seconds, and the charge can be carried. When released, Zorua will sound his cry and anyone in front of him will be blown back. The longer the move is charged, the more knockback it does. No damage and fair-great knockback.
Side B: Fury Swipes
Zorua's claws glow silver, and he slashes in front of him twice. On the third slash, Zorua unleashes a barrage of lightning-fast swipes that can trap the opponent for quite a long time. The third swipe can be held forever, but eventually the opponent will be able to escape. If the Up direction is pressed during the third swipe, Zorua will perform a fourth, finishing swipe upwards. If the Down direction is pressed the Zorua will perform his fourth swipe downwards. The fourth swipe is the strongest swipe, but it is also the hardest to aim. The Up swipe can only be used on the ground and the Down swipe can only be used in the air. This move does not tire Zorua out. Great damage and good knockback.
Up B: Faint Attack
Zorua will disappear for a second, and then reappear somewhere else. A circle of darkness comes out wherever he reappears, and damages anyone near it. Zorua can choose to reappear in any direction he wants, and the attack has the same range every time it is used. Fair damage and good knockback.
Down B: Withdraw
N returns Zorua to its Pokeball, and then sends out Zoroark. Not a word is spoken during this move, but you can hear Zoroark's cry after he is sent out. Takes as long as Pokemon Trainer's Down B does. No damage and no knockback.
Neutral A: Slashes twice with his tiny hands, then tackles the opponent.
Side A: Turns around and kicks both of his legs at the opponent.
Up A: Swipes at the air above his head.
Down A: Kicks outwards using one leg. Does very little damage and can be used extremely fast.
Dash Attack: Headbutts into the opponent.
Side Smash: Smacks his hand down in front of him.
Up Smash: A small ball of dark energy explodes above his head.
Down Smash: Zorua performs a split with his four legs. Two are in front and two are behind.
Neutral Aerial: Zorua extends a paw out in front of him and a leg out behind him.
Forward Aerial: Slashes out in front of him.
Back Aerial: Spins around and claws at the area behind him. This move will change the direction Zorua is facing.
Up Aerial: Flips quickly and kicks upward.
Down Aerial: Pushes his legs down, into the opponent's face. This move will spike. If successful Zorua will gain little vertical momentum.
Grab Attack: Taps the opponent with one hand.
Forward Throw: Tackles the opponent. Fair damage and good knockback.
Back Throw: Jumps over the opponent and kicks them backwards from the front. Great damage and good knockback.
Up Throw: Pushes both of his hands upward onto the opponent. Good damage and good knockback.
Down Throw: Zorua puts the opponent down and jumps on top of them. Good damage and fair knockback.
Ledge Attack: Zorua gets up and smacks his tail at the opponent.
Stage Entry: N calmly throws a Pokeball onto the stage. Zorua emits his cry after he is sent out.
Up Taunt: Zorua chases his tail for a while.
Down Taunt: Zorua gets on the ground and starts rolling back and forth.
Side Taunt: Zorua shakes, resembling a dog. His fur is puffed up for a second before it returns back to normal.
Victory Pose 1: Zorua does a flip in front of the screen, and then holds his chin up high. N chuckles as he watches.
Victory Pose 2: N throws a bone into the air, and Zorua jumps up and catches it with his mouth. N smiles and pets Zorua.
--------------------------------------------------------
Zoroark Moveset
Zoroark is a moderately fast, moderately heavy character.
Neutral B: Illusion
Zoroark swipes his hand in front of him, and grabs any opponent that is there. This move has very little range. After the opponent is grabbed, Zoroark will stare into their eyes for a second, and then glows black. An invisible force pushes the opponent far away from Zoroark, and he transforms into a silhouette of the enemy. Zoroark can then use every special move, smash attack, and tilt of the enemy. The Illusion breaks once Zoroark leaves the ground, or once he is hit by an attack. The Illusion will also break if Zoroark attempts to taunt, or if he grabs onto a ledge. No damage and good knockback.
Side B: Dark Pulse
Zoroark smacks his hand against the ground, and a pulse of darkness emits from it. Zoroark cannot move while the button is held, but the pulse can. It travels in a straight line, on the ground. The end of its range is the end of the platform it is used on. The pulse moves slowly, and can be reflected only by an reflector that works on the ground. (Example: Wolf's Down B can reflect it but Mario's Side B can't) Zoroark loses control of it once it is reflected, and the pulse immediately travels until the end of its range. When in control, Zoroark can stop the dark pulse by releasing the button. It damages anyone on the ground that is hit by it. Good damage and little knockback.
Up B: Night Slash
Dark energy surrounds Zoroark. Then, it propels him in any direction of choice. Anyone touched by Zoroark while he is using this move is hurt.
Down B: Withdraw
N returns Zoroark to its Pokeball, and then sends out Klinklang. Not a word is spoken during this move, but you can hear Klinklang's cry after he is sent out. Takes as long as Pokemon Trainer's Down B does. No damage and no knockback.
Neutral A: Zoroark slashes twice.
Side A: Slashes outwards with his right hand.
Up A: Slashes upwards. Has a sweet spot at the end of its range.
Down A: Claws once at the opponent's feet. Will spike down an airborne opponent if they are hit.
Dash Attack: Throws his hands in front of himself and rolls across.
Side Smash: Claps both hands together in front of him.
Up Smash: Waves both of his hands above his head.
Down Smash: Claws his hands against the ground while he spins.
Neutral Aerial: Spins around in the air.
Forward Aerial: Performs a forward downward slash.
Back Aerial: Zoroark shoves his back into the opponent.
Up Aerial: Thrusts his head upwards.
Down Aerial: Kicks down with one foot. Very strong spike but little range.
Grab Attack: Smacks the opponent.
Forward Throw: Knees the opponent in the abdomen. Good damage and good knockback.
Back Throw: Grabs the opponent, turns around, and throws them outwards. Fair damage and good knockback.
Up Throw: Punches the opponent upwards. Good damage and fair knockback.
Down Throw: Slams the opponent on the ground while he is grabbing them. Great damage and fair knockback.
Ledge Attack: Zoroark claws at the opponent's legs as he gets up.
Stage Entry: N calmly throws a Pokeball onto the stage. Zoroark emits his cry after he is sent out.
Up Taunt: Zoroark lets out a loud, droning roar.
Down Taunt: Zoroark polishes his claws for a moment.
Side Taunt: Zoroark curls up on the ground and appears as if he was napping.
Victory Pose 1: Zoroark rears back his fist and approaches the screen. N suddenly appears from behind and drags him back. He laughs and pets Zoroark.
Victory Pose 2: There are two N's on the screen. One glows black and changes into Zoroark, and the other N is surprised.
--------------------------------------------------------
Klinklang Moveset
Klinklang is a heavy, slow character. It hovers above the ground and moves using magnetism.
Neutral B: Discharge
Klinklang releases electricity from inside, and shocks anyone near him. He damages himself 5% every time he uses this move, but does 10% to the enemy. If hit, an opponent will be paralyzed at that spot for 2 seconds. Klinklang can then use this time wisely and choose a close-range attack to use. Fair damage and no knockback.
Side B: Flash Cannon
Klinklang draws gray energy into himself, and then releases a small sphere of it out. The sphere travels straightforward. It can be controlled when to explode by releasing the button. It also explodes on impact of anything, and has the maximum range of Link's Side B. Can be used in the air, but only once. He is not tired out, but must touch the ground in order to use the move again. Good damage and good knockback.
Up B: Levitate
Klinklang uses a force of gravity to propel himself into the air. He moves very fast while using this move, and is not tired out until it's at the end of its range. He can move both horizontally and vertically by using this, but must move a little vertical before attempting to move horizontally. No damage and no knockback.
Down B: Withdraw
N returns Klinklang to its Pokeball, and then sends out Zorua. Not a word is spoken during this move, but you can hear Zorua's cry after he is sent out. Takes as long as Pokemon Trainer's Down B does. No damage and no knockback.
Neutral A: The bigger gear spins once.
Side A: Flicks his body out towards the opponent.
Up A: The smaller gear spins.
Down A: Throws the smaller gear down, and then it quickly comes back around.
Dash Attack: Chucks the smaller gear while running, then runs to reconnect to it.
Side Smash: Holds the smaller gear out while it spins.
Up Smash: The tops of Klinklang's gears spin rapidly.
Down Smash: The bottom of Klinklang's body will spin completely around, damaging anyone near him.
Neutral Aerial: All of Klinklang's gears spin for a short amount of time.
Forward Aerial: Tilts his body diagonally forwards.
Back Aerial: The smaller front gear will spin completely around Klinklang's body.
Up Aerial: The smaller gear flies up a bit and then comes back down.
Down Aerial: A blast of white energy is shot from under Klinklang.
[strike]->[/strike]Awesome arrow is awesome
Grab: Klinklang will send his smaller front gear out to grab opponents. If successful, the gear will push the opponent towards Klinklang, while staying behind it. If not successful, the gear will fall to the ground before returning to Klinklang. He is vulnerable while the gear is on the ground. This move can also be used as a tether, and is capable of latching onto ledges. If used in the air the smaller gear will not fall, and instead return to Klinklang quickly.
Grab Attack: The smaller gear spins once.
Forward Throw: The smaller gear moves up and out of the way, while the rest of Klinklang's body tackles the opponent. Great damage and fair knockback.
Back Throw: Klinklang's body moves behind and the smaller gear pushes the opponent backwards. Fair damage and great knockback.
Up Throw: The smaller gear will go under the opponent and push them upward. Fair damage and good knockback.
Down Throw: The smaller gear will get on top of the opponent and come crashing down. Good damage and fair knockback.
Ledge Attack: The smaller gear flips the entirety of Klinklang's body onto the stage. It then follows up by reconnecting.
Stage Entry: N calmly throws a Pokeball onto the stage. Klinklang emits his cry after he is sent out.
Up Taunt: Klinklang's gears spin slowly and obnoxiously.
Down Taunt: Klinklang uses magnetism to flip himself over.
Side Taunt: Klinklang releases a lot of gasoline from under him. The gasoline can be seen clearly.
Victory Pose 1: Klinklang's gears spin fast.....faster....even faster....super fast....when suddenly N faints and Klinklang turns around to look.
Victory Pose 2: Klinklang is seen flying around the screen, when suddenly he hits N in the face and knocks him down. Klinklang stares down at N.
--------------------------------------------------------
Final Smash: Summoning of the Stones
N withdraws his current Pokemon, and then takes out the Dark and Light Stones. If he holds the Up button at this time, the Dark Stone will transform into Zekrom (right picture). If he holds the Down button at this time, the Light Stone will transform into Reshiram (left picture). If no direction is pressed then one is randomly chosen. Zekrom and Reshiram are both the size of one Bowser (to keep things easy and simple) and can only use Neutral B. Zekrom's Neutral B is Fusion Bolt, in which he engulfs himself with a ball of electricity, jumps up, and homes in to the closest opponent. Reshiram's Neutral B is Fusion Flare, in which a ball of fire appears on top of Reshiram's head. Small sparks of fire shoot out of it, and this can be aimed but Reshiram cannot move while the button is held. When the Neutral B is done attacking, the Pokemon can then move again and figure out where they should strike next. Both Zekrom and Reshiram cannot jump, but Zekrom's Neutral B may have him stop in the air. Lasts shorter than most Final Smashes. When it is finished, Zekrom/Reshiram turns back into its Stone and the Pokemon N originally had out is sent back in. Zekrom-Good damage and great knockback. Reshiram-Great damage and good knockback.
--------------------------------------------------------
(Note: the original post has more pictures)

N is a new [strike]antagonist[/strike] protagonist to the Pokemon series, and appears in Generation V. He has a unique ability that allows him to communicate with and understand Pokemon. With this ability, he befriends the legendary Pokemon Zekrom and Reshiram.
N cannot fight. He acts like the Pokemon Trainer in Brawl, and stands on the same platform. His arms are crossed and his head lowered, but he is still aware of what is happening. Unlike Pokemon Trainer, N remains silent throughout the entire brawl, even when switching out. He will be using three Pokemon to fight for him, with a special one for his Final Smash. The three Pokemon are as follows: Zorua , Zoroark , Klinklang.
Zorua Moveset
Zorua is a lightweight, fast character.
Neutral B: Roar
Zorua moves his head back and roars. This move can be charged at a maximum of 4 seconds, and the charge can be carried. When released, Zorua will sound his cry and anyone in front of him will be blown back. The longer the move is charged, the more knockback it does. No damage and fair-great knockback.
Side B: Fury Swipes
Zorua's claws glow silver, and he slashes in front of him twice. On the third slash, Zorua unleashes a barrage of lightning-fast swipes that can trap the opponent for quite a long time. The third swipe can be held forever, but eventually the opponent will be able to escape. If the Up direction is pressed during the third swipe, Zorua will perform a fourth, finishing swipe upwards. If the Down direction is pressed the Zorua will perform his fourth swipe downwards. The fourth swipe is the strongest swipe, but it is also the hardest to aim. The Up swipe can only be used on the ground and the Down swipe can only be used in the air. This move does not tire Zorua out. Great damage and good knockback.
Up B: Faint Attack
Zorua will disappear for a second, and then reappear somewhere else. A circle of darkness comes out wherever he reappears, and damages anyone near it. Zorua can choose to reappear in any direction he wants, and the attack has the same range every time it is used. Fair damage and good knockback.
Down B: Withdraw
N returns Zorua to its Pokeball, and then sends out Zoroark. Not a word is spoken during this move, but you can hear Zoroark's cry after he is sent out. Takes as long as Pokemon Trainer's Down B does. No damage and no knockback.
Neutral A: Slashes twice with his tiny hands, then tackles the opponent.
Side A: Turns around and kicks both of his legs at the opponent.
Up A: Swipes at the air above his head.
Down A: Kicks outwards using one leg. Does very little damage and can be used extremely fast.
Dash Attack: Headbutts into the opponent.
Side Smash: Smacks his hand down in front of him.
Up Smash: A small ball of dark energy explodes above his head.
Down Smash: Zorua performs a split with his four legs. Two are in front and two are behind.
Neutral Aerial: Zorua extends a paw out in front of him and a leg out behind him.
Forward Aerial: Slashes out in front of him.
Back Aerial: Spins around and claws at the area behind him. This move will change the direction Zorua is facing.
Up Aerial: Flips quickly and kicks upward.
Down Aerial: Pushes his legs down, into the opponent's face. This move will spike. If successful Zorua will gain little vertical momentum.
Grab Attack: Taps the opponent with one hand.
Forward Throw: Tackles the opponent. Fair damage and good knockback.
Back Throw: Jumps over the opponent and kicks them backwards from the front. Great damage and good knockback.
Up Throw: Pushes both of his hands upward onto the opponent. Good damage and good knockback.
Down Throw: Zorua puts the opponent down and jumps on top of them. Good damage and fair knockback.
Ledge Attack: Zorua gets up and smacks his tail at the opponent.
Stage Entry: N calmly throws a Pokeball onto the stage. Zorua emits his cry after he is sent out.
Up Taunt: Zorua chases his tail for a while.
Down Taunt: Zorua gets on the ground and starts rolling back and forth.
Side Taunt: Zorua shakes, resembling a dog. His fur is puffed up for a second before it returns back to normal.
Victory Pose 1: Zorua does a flip in front of the screen, and then holds his chin up high. N chuckles as he watches.
Victory Pose 2: N throws a bone into the air, and Zorua jumps up and catches it with his mouth. N smiles and pets Zorua.
--------------------------------------------------------
Zoroark is a moderately fast, moderately heavy character.
Neutral B: Illusion
Zoroark swipes his hand in front of him, and grabs any opponent that is there. This move has very little range. After the opponent is grabbed, Zoroark will stare into their eyes for a second, and then glows black. An invisible force pushes the opponent far away from Zoroark, and he transforms into a silhouette of the enemy. Zoroark can then use every special move, smash attack, and tilt of the enemy. The Illusion breaks once Zoroark leaves the ground, or once he is hit by an attack. The Illusion will also break if Zoroark attempts to taunt, or if he grabs onto a ledge. No damage and good knockback.
Side B: Dark Pulse
Zoroark smacks his hand against the ground, and a pulse of darkness emits from it. Zoroark cannot move while the button is held, but the pulse can. It travels in a straight line, on the ground. The end of its range is the end of the platform it is used on. The pulse moves slowly, and can be reflected only by an reflector that works on the ground. (Example: Wolf's Down B can reflect it but Mario's Side B can't) Zoroark loses control of it once it is reflected, and the pulse immediately travels until the end of its range. When in control, Zoroark can stop the dark pulse by releasing the button. It damages anyone on the ground that is hit by it. Good damage and little knockback.
Up B: Night Slash
Dark energy surrounds Zoroark. Then, it propels him in any direction of choice. Anyone touched by Zoroark while he is using this move is hurt.
Down B: Withdraw
N returns Zoroark to its Pokeball, and then sends out Klinklang. Not a word is spoken during this move, but you can hear Klinklang's cry after he is sent out. Takes as long as Pokemon Trainer's Down B does. No damage and no knockback.
Neutral A: Zoroark slashes twice.
Side A: Slashes outwards with his right hand.
Up A: Slashes upwards. Has a sweet spot at the end of its range.
Down A: Claws once at the opponent's feet. Will spike down an airborne opponent if they are hit.
Dash Attack: Throws his hands in front of himself and rolls across.
Side Smash: Claps both hands together in front of him.
Up Smash: Waves both of his hands above his head.
Down Smash: Claws his hands against the ground while he spins.
Neutral Aerial: Spins around in the air.
Forward Aerial: Performs a forward downward slash.
Back Aerial: Zoroark shoves his back into the opponent.
Up Aerial: Thrusts his head upwards.
Down Aerial: Kicks down with one foot. Very strong spike but little range.
Grab Attack: Smacks the opponent.
Forward Throw: Knees the opponent in the abdomen. Good damage and good knockback.
Back Throw: Grabs the opponent, turns around, and throws them outwards. Fair damage and good knockback.
Up Throw: Punches the opponent upwards. Good damage and fair knockback.
Down Throw: Slams the opponent on the ground while he is grabbing them. Great damage and fair knockback.
Ledge Attack: Zoroark claws at the opponent's legs as he gets up.
Stage Entry: N calmly throws a Pokeball onto the stage. Zoroark emits his cry after he is sent out.
Up Taunt: Zoroark lets out a loud, droning roar.
Down Taunt: Zoroark polishes his claws for a moment.
Side Taunt: Zoroark curls up on the ground and appears as if he was napping.
Victory Pose 1: Zoroark rears back his fist and approaches the screen. N suddenly appears from behind and drags him back. He laughs and pets Zoroark.
Victory Pose 2: There are two N's on the screen. One glows black and changes into Zoroark, and the other N is surprised.
--------------------------------------------------------
Klinklang Moveset
Klinklang is a heavy, slow character. It hovers above the ground and moves using magnetism.
Neutral B: Discharge
Klinklang releases electricity from inside, and shocks anyone near him. He damages himself 5% every time he uses this move, but does 10% to the enemy. If hit, an opponent will be paralyzed at that spot for 2 seconds. Klinklang can then use this time wisely and choose a close-range attack to use. Fair damage and no knockback.
Side B: Flash Cannon
Klinklang draws gray energy into himself, and then releases a small sphere of it out. The sphere travels straightforward. It can be controlled when to explode by releasing the button. It also explodes on impact of anything, and has the maximum range of Link's Side B. Can be used in the air, but only once. He is not tired out, but must touch the ground in order to use the move again. Good damage and good knockback.
Up B: Levitate
Klinklang uses a force of gravity to propel himself into the air. He moves very fast while using this move, and is not tired out until it's at the end of its range. He can move both horizontally and vertically by using this, but must move a little vertical before attempting to move horizontally. No damage and no knockback.
Down B: Withdraw
N returns Klinklang to its Pokeball, and then sends out Zorua. Not a word is spoken during this move, but you can hear Zorua's cry after he is sent out. Takes as long as Pokemon Trainer's Down B does. No damage and no knockback.
Neutral A: The bigger gear spins once.
Side A: Flicks his body out towards the opponent.
Up A: The smaller gear spins.
Down A: Throws the smaller gear down, and then it quickly comes back around.
Dash Attack: Chucks the smaller gear while running, then runs to reconnect to it.
Side Smash: Holds the smaller gear out while it spins.
Up Smash: The tops of Klinklang's gears spin rapidly.
Down Smash: The bottom of Klinklang's body will spin completely around, damaging anyone near him.
Neutral Aerial: All of Klinklang's gears spin for a short amount of time.
Forward Aerial: Tilts his body diagonally forwards.
Back Aerial: The smaller front gear will spin completely around Klinklang's body.
Up Aerial: The smaller gear flies up a bit and then comes back down.
Down Aerial: A blast of white energy is shot from under Klinklang.
[strike]->[/strike]Awesome arrow is awesome
Grab: Klinklang will send his smaller front gear out to grab opponents. If successful, the gear will push the opponent towards Klinklang, while staying behind it. If not successful, the gear will fall to the ground before returning to Klinklang. He is vulnerable while the gear is on the ground. This move can also be used as a tether, and is capable of latching onto ledges. If used in the air the smaller gear will not fall, and instead return to Klinklang quickly.
Grab Attack: The smaller gear spins once.
Forward Throw: The smaller gear moves up and out of the way, while the rest of Klinklang's body tackles the opponent. Great damage and fair knockback.
Back Throw: Klinklang's body moves behind and the smaller gear pushes the opponent backwards. Fair damage and great knockback.
Up Throw: The smaller gear will go under the opponent and push them upward. Fair damage and good knockback.
Down Throw: The smaller gear will get on top of the opponent and come crashing down. Good damage and fair knockback.
Ledge Attack: The smaller gear flips the entirety of Klinklang's body onto the stage. It then follows up by reconnecting.
Stage Entry: N calmly throws a Pokeball onto the stage. Klinklang emits his cry after he is sent out.
Up Taunt: Klinklang's gears spin slowly and obnoxiously.
Down Taunt: Klinklang uses magnetism to flip himself over.
Side Taunt: Klinklang releases a lot of gasoline from under him. The gasoline can be seen clearly.
Victory Pose 1: Klinklang's gears spin fast.....faster....even faster....super fast....when suddenly N faints and Klinklang turns around to look.
Victory Pose 2: Klinklang is seen flying around the screen, when suddenly he hits N in the face and knocks him down. Klinklang stares down at N.
--------------------------------------------------------
Final Smash: Summoning of the Stones
N withdraws his current Pokemon, and then takes out the Dark and Light Stones. If he holds the Up button at this time, the Dark Stone will transform into Zekrom (right picture). If he holds the Down button at this time, the Light Stone will transform into Reshiram (left picture). If no direction is pressed then one is randomly chosen. Zekrom and Reshiram are both the size of one Bowser (to keep things easy and simple) and can only use Neutral B. Zekrom's Neutral B is Fusion Bolt, in which he engulfs himself with a ball of electricity, jumps up, and homes in to the closest opponent. Reshiram's Neutral B is Fusion Flare, in which a ball of fire appears on top of Reshiram's head. Small sparks of fire shoot out of it, and this can be aimed but Reshiram cannot move while the button is held. When the Neutral B is done attacking, the Pokemon can then move again and figure out where they should strike next. Both Zekrom and Reshiram cannot jump, but Zekrom's Neutral B may have him stop in the air. Lasts shorter than most Final Smashes. When it is finished, Zekrom/Reshiram turns back into its Stone and the Pokemon N originally had out is sent back in. Zekrom-Good damage and great knockback. Reshiram-Great damage and good knockback.
--------------------------------------------------------
Last edited: