iRAWR
rawrrr
I DID NOT MAKE THIS TUT, THE "I's"IN THIS TUT IS NOT ME, SO...... BIG BIG THANKS TO ART FOR MAKING THIS NICE TUT
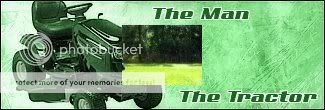
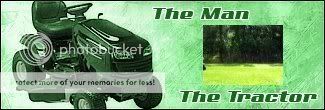
In this tutorial, I will show you how to import video footage into GIMP using the GAP (GIMP Animation Package), which is a separate download from GIMP. We will create the the animated signature above using either the quicktime movie or avi file and the background that I have provided for your use. Don't misunderstand me....the sig we are creating is only an example, not something I consider to be incredible.
Although this tutorial is very simple in nature, please keep in mind, importing movies using GAP is not limited to animated avatars and signatures. I'm only presenting it for sig creation right now because it's something that a lot of people are interested in and it's an easy format for web-based images. The possibilities are really endless. Using the features of GIMP and GAP, you could create wonderful home movies to share with friends and family. Just don't show them too many home movies or they'll probably not want to visit your home anymore!
This tutorial is written for someone who has a pretty good use of GIMP features. The only thing we will be using GAP for is the conversion process. So, if you've never experimented with GAP or you've been afraid to, try this tutorial out. I'm sure you'll find it to be straightforward.
I'm using GAP version 2.2.0 for Windows. This version contains the necessary programming implementations to convert video footage. So, if you don't have at least this version of GAP, I suggest you download it here: Windows Users (http://gimp-win.sourceforge.net/stable.html) and Linux users (http://gimp.org/downloads/).
GAP has the ability to convert not just QuickTime movies (mov), but avis, mpgs, mpegs, and from what I've read, some dvd formats (vob files.) I've not been successful with the vob format, but I have with the others.
Let's Begin:
Step 1:
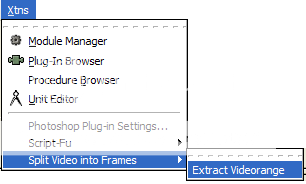
In the main GIMP window, go to the Xtns Menu > Split Video Into Frames > Extract Videorange.
Step 2:
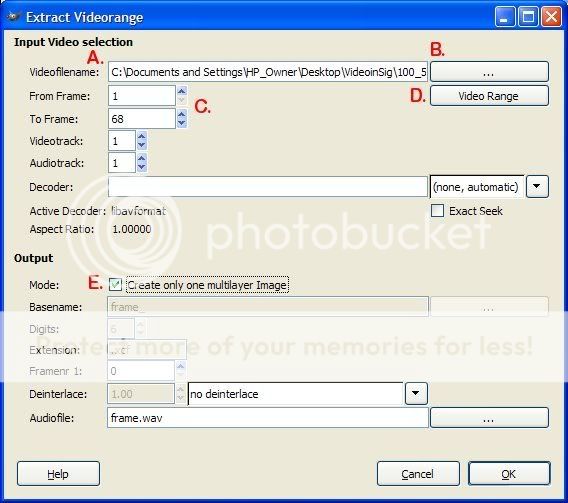
When the following window appears, we will be concerned with letter A-E in red below.
A: This is where you tell GAP to look for your file. If you know the file path name to the video, type or copy/paste the pathname here.
B: If you don't know the file path name, click this button and you'll be given a window with dropdown menus to search for it.
Using A or B, go ahead and enter the file path name to the Quicktime movie (mov). You can experiment with the avi file later.
C: Enter the the video frame range you want to convert. I already know that my video has 68 frames in it. So, go ahead and enter the number 68 in the "To Frame" area.
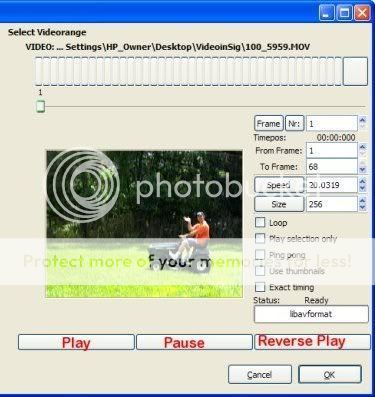
D: If you don't know which frames you want to convert, click this button. You'll be given a preview window that will show you the number of frames in your video and you can watch the video as well.
E: For this tutorial, we will just be telling GAP to make one multi-layer image. However, if you were going to do additional modifications in GIMP or GAP, you probably would want to leave this one deselected so that each frame was added to its own image. But, for this tutorial, go ahead and select it.
Here's a screenshot of what the Video Range window looks like (Letter D above)
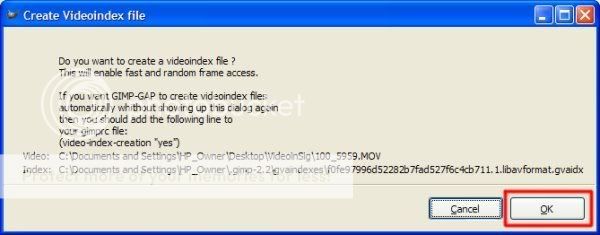
You may also see this menu appear when opening up the Select Videorange window (Letter D). If you do, clicking either button is fine. I just chose yes. The window is pretty self-explanatory.
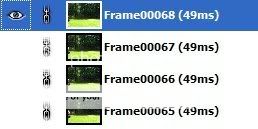
Now, click OK to convert the video. Here's a partial screenshot of the imported video footage.
IMPORTANT: When working on video footage in this fashion, it appears that the Undo capabilities are disabled. This could be very problematic if you make a mistake. However, one way to work around it, just in case you do make a mistake, is to have a good spare ready to go. To do that, go to the Image Menu > Duplicate (Ctrl+D) and GIMP will make an exact copy ready for use if you need it. Just make sure you're always working on the right copy! So, if you do make a mistake and there's no easy way to correct it, shut down the one with the error(s) without saving and start again fresh with the copy. Otherwise, you'll need to begin all over.
Step 3:
Now the next thing we need to do is resize the image to fit our sig background. Since I already know what the dimensions are, I'll give them to you here. For any sigs you do in the future, you'll need to figure out the best dimensions on your own.
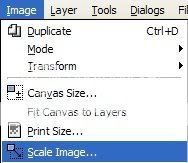
To scale the image, go to the Image Menu > Scale Image:
and choose the following settings:
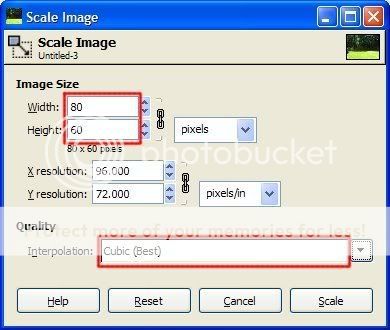
I don't have a screenshot for the results of this last step, but your image should have be resized accordingly.
Step 4:
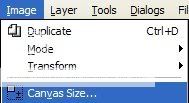
Now, let's resize the canvas so we can add our sig background. To do this, go to the Image Menu > Canvas Size
and set the parameters as follows:
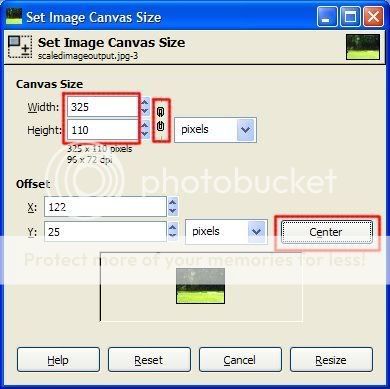
Add the Width and Height of the sig background we want to add (Ours is 325 W and 110 H). I'm centering mine in the image, but it doesn't really matter because we're going to move it anyway. Click Resize.
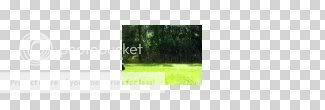
Here's the output. I've added a checkerboard to show that it has a transparent background.
Step 5:
To add the background sig, go to the File Menu > Open as Layer...

And point GIMP to the location of the sig background in the window that opens and the background will be added to the image. Or, you can just drop/drag the sig background onto the frames.
Step 6:
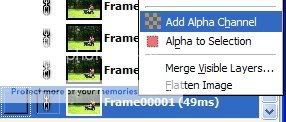
The sig background needs to be moved to the bottom. To do so, we need to add an Alpha Channel to the very bottom layer or we won't be allowed to move the background to the bottom. To do this, go to the very bottom of the layer stack, right-click on the bottom layer, and choose Add Alpha Channel.
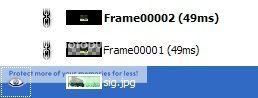
Next, click on the sig background layer in the dialog window and drag it to the very bottom of the stack. Your layers should look like this:
and your image window like this:
Step 7:
Now, we need to move the video into place. This would be very difficult to do each layer manually, and I was going to write a script for linking all the layers, but saulgoode at gimptalk.com told me you can link all layers just by clicking the chain next to the image and then doing a Shift+Click on the same layer. Thanks for the great tip, saulgoode!
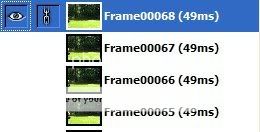
Click on the chain next to any frame to turn on the link button, then Shift+Click on the same frame to link all layers. Make sure you turn off the chain next to the background image or you'll be moving the background also.
Here's two screenshots of before and after linking:
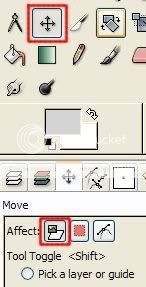
Now, with any one of the linked layers highlighted (in blue as shown above), use your grab your move tool (4-headed arrow), make sure it's settings are as follows, and move the layer to a location similar to mine below. You can also use the arrow keys to nudge it in place.
Here's a shot of the layers moved into their correct location:
Step 8:
Here's where we bring it to a close. Go back to the layer dialog window (the place that shows all your layers stacked up) and highlight the first layer up from the main sig background. (no screenshot for this).
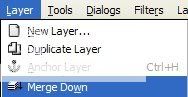
We need to merge this layer with the background:
Go to the Layer Menu > Merge Down
Step 9:
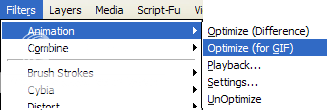
Test out your animation. Filters Menu > Animation > Playback.
If you're pleased with the result: You can try different optimization settings to reduce the filesize. I'll leave this up to you, but here's the menus you'll be interested in:
AND
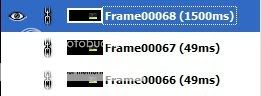
If you want to add a pause in the final frame before it starts all over again, double-click on the very top frame and insert a larger number in the (xxxx ms) section. 1/2 second = 500 ms, 1 second = 1,000 ms, 2 seconds = 2,000 ms, etc.
Step 10:
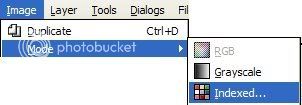
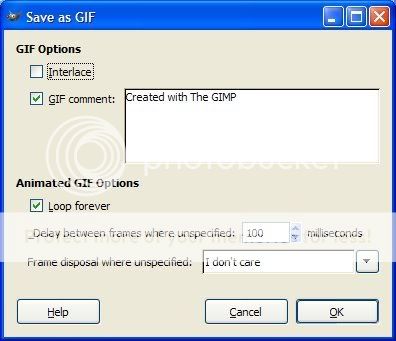
Save as an animated gif.
File Menu > Save or Save as.... Pick the name and add the ".gif" extension to the end. Here's the settings to use for the windows that appear:

Again, your results should be something similar to this:
I hope you enjoyed this tutorial. If you have any questions or comments, please send me a note here: http://fence-post.deviantart.com/
Remember, GIMP and GAP are a lot more than sigs and avatars. This was only a primer for bigger and better things.I look forward to seeing your results.
Cheers!
Art
In this tutorial, I will show you how to import video footage into GIMP using the GAP (GIMP Animation Package), which is a separate download from GIMP. We will create the the animated signature above using either the quicktime movie or avi file and the background that I have provided for your use. Don't misunderstand me....the sig we are creating is only an example, not something I consider to be incredible.
Although this tutorial is very simple in nature, please keep in mind, importing movies using GAP is not limited to animated avatars and signatures. I'm only presenting it for sig creation right now because it's something that a lot of people are interested in and it's an easy format for web-based images. The possibilities are really endless. Using the features of GIMP and GAP, you could create wonderful home movies to share with friends and family. Just don't show them too many home movies or they'll probably not want to visit your home anymore!
This tutorial is written for someone who has a pretty good use of GIMP features. The only thing we will be using GAP for is the conversion process. So, if you've never experimented with GAP or you've been afraid to, try this tutorial out. I'm sure you'll find it to be straightforward.
I'm using GAP version 2.2.0 for Windows. This version contains the necessary programming implementations to convert video footage. So, if you don't have at least this version of GAP, I suggest you download it here: Windows Users (http://gimp-win.sourceforge.net/stable.html) and Linux users (http://gimp.org/downloads/).
GAP has the ability to convert not just QuickTime movies (mov), but avis, mpgs, mpegs, and from what I've read, some dvd formats (vob files.) I've not been successful with the vob format, but I have with the others.
Let's Begin:
Step 1:
In the main GIMP window, go to the Xtns Menu > Split Video Into Frames > Extract Videorange.
Step 2:
When the following window appears, we will be concerned with letter A-E in red below.
A: This is where you tell GAP to look for your file. If you know the file path name to the video, type or copy/paste the pathname here.
B: If you don't know the file path name, click this button and you'll be given a window with dropdown menus to search for it.
Using A or B, go ahead and enter the file path name to the Quicktime movie (mov). You can experiment with the avi file later.
C: Enter the the video frame range you want to convert. I already know that my video has 68 frames in it. So, go ahead and enter the number 68 in the "To Frame" area.
D: If you don't know which frames you want to convert, click this button. You'll be given a preview window that will show you the number of frames in your video and you can watch the video as well.
E: For this tutorial, we will just be telling GAP to make one multi-layer image. However, if you were going to do additional modifications in GIMP or GAP, you probably would want to leave this one deselected so that each frame was added to its own image. But, for this tutorial, go ahead and select it.
Here's a screenshot of what the Video Range window looks like (Letter D above)
You may also see this menu appear when opening up the Select Videorange window (Letter D). If you do, clicking either button is fine. I just chose yes. The window is pretty self-explanatory.
Now, click OK to convert the video. Here's a partial screenshot of the imported video footage.
IMPORTANT: When working on video footage in this fashion, it appears that the Undo capabilities are disabled. This could be very problematic if you make a mistake. However, one way to work around it, just in case you do make a mistake, is to have a good spare ready to go. To do that, go to the Image Menu > Duplicate (Ctrl+D) and GIMP will make an exact copy ready for use if you need it. Just make sure you're always working on the right copy! So, if you do make a mistake and there's no easy way to correct it, shut down the one with the error(s) without saving and start again fresh with the copy. Otherwise, you'll need to begin all over.
Step 3:
Now the next thing we need to do is resize the image to fit our sig background. Since I already know what the dimensions are, I'll give them to you here. For any sigs you do in the future, you'll need to figure out the best dimensions on your own.
To scale the image, go to the Image Menu > Scale Image:
and choose the following settings:
I don't have a screenshot for the results of this last step, but your image should have be resized accordingly.
Step 4:
Now, let's resize the canvas so we can add our sig background. To do this, go to the Image Menu > Canvas Size
and set the parameters as follows:
Add the Width and Height of the sig background we want to add (Ours is 325 W and 110 H). I'm centering mine in the image, but it doesn't really matter because we're going to move it anyway. Click Resize.
Here's the output. I've added a checkerboard to show that it has a transparent background.
Step 5:
To add the background sig, go to the File Menu > Open as Layer...
And point GIMP to the location of the sig background in the window that opens and the background will be added to the image. Or, you can just drop/drag the sig background onto the frames.
Step 6:
The sig background needs to be moved to the bottom. To do so, we need to add an Alpha Channel to the very bottom layer or we won't be allowed to move the background to the bottom. To do this, go to the very bottom of the layer stack, right-click on the bottom layer, and choose Add Alpha Channel.
Next, click on the sig background layer in the dialog window and drag it to the very bottom of the stack. Your layers should look like this:
and your image window like this:
Step 7:
Now, we need to move the video into place. This would be very difficult to do each layer manually, and I was going to write a script for linking all the layers, but saulgoode at gimptalk.com told me you can link all layers just by clicking the chain next to the image and then doing a Shift+Click on the same layer. Thanks for the great tip, saulgoode!
Click on the chain next to any frame to turn on the link button, then Shift+Click on the same frame to link all layers. Make sure you turn off the chain next to the background image or you'll be moving the background also.
Here's two screenshots of before and after linking:
Now, with any one of the linked layers highlighted (in blue as shown above), use your grab your move tool (4-headed arrow), make sure it's settings are as follows, and move the layer to a location similar to mine below. You can also use the arrow keys to nudge it in place.
Here's a shot of the layers moved into their correct location:
Step 8:
Here's where we bring it to a close. Go back to the layer dialog window (the place that shows all your layers stacked up) and highlight the first layer up from the main sig background. (no screenshot for this).
We need to merge this layer with the background:
Go to the Layer Menu > Merge Down
Step 9:
Test out your animation. Filters Menu > Animation > Playback.
If you're pleased with the result: You can try different optimization settings to reduce the filesize. I'll leave this up to you, but here's the menus you'll be interested in:
AND
If you want to add a pause in the final frame before it starts all over again, double-click on the very top frame and insert a larger number in the (xxxx ms) section. 1/2 second = 500 ms, 1 second = 1,000 ms, 2 seconds = 2,000 ms, etc.
Step 10:
Save as an animated gif.
File Menu > Save or Save as.... Pick the name and add the ".gif" extension to the end. Here's the settings to use for the windows that appear:
Again, your results should be something similar to this:
I hope you enjoyed this tutorial. If you have any questions or comments, please send me a note here: http://fence-post.deviantart.com/
Remember, GIMP and GAP are a lot more than sigs and avatars. This was only a primer for bigger and better things.I look forward to seeing your results.
Cheers!
Art
") .
.